(Updated January 12, 2026)
Table of contents
-
JavaFX Overview
Dialogs
JavaFX Application
The
StageThe
SceneCommon UI Controls
Layouts
Events
Graphics
Exercises
JavaFX Overview
The JavaFX runtime environment is built upon the idea of a JavaFX application. Unlike Swing, a series of components your application can extend, JavaFX uses the Application class to create the running program.
The Application class implements a few key methods, as shown in Table 1. Specifically, these methods concern a JavaFX application’s structure and life cycle.
Some methods of the Application class. |
|---|
void init()This method initializes the application. The default init method does nothing. You can override this to perform initialization tasks. This method must never create any javafx.stage.Stage or javafx.scene.Scene objects. Overriding this method is not required. |
void start(Stage primaryStage)This method is where all the magic happens. You override this method to build and launch your application. |
void stop()This method can tear down anything that needs finalizing, closing files, etc. If you override the stop() method, you may perform such tasks. The default stop() method does nothing. Like the init() method, it is not necessary to override this method. |
Table 1: Some methods available to the Application class.
The process of application startup and termination is as follows:
- The
Applicationinstance is created. - The
init()method is invoked on the JavaFX Launcher Thread. - The
start()method is invoked on the JavaFX Application Thread. - The runtime waits for the application to finish. This can be when
javafx.application.Platform.exit()is invoked or when the last window has been closed andPlatform‘simplicitExitattribute is set totrue. - The
stop()method is invoked on the JavaFX Application Thread.
There is no need for a main() method when creating a JavaFX application. However, if you will make a JAR file type executable, you will need to provide one.
The JavaFX program in Example 1 demonstrates the life cycle of a JavaFX application. This is for demonstration purposes only. This is not a typical framework.
import javafx.application.Application;
import javafx.application.Platform;
import javafx.stage.Stage;

public class JavaFXLifeCycle extends Application {

    /**
     * JavaFX Init routine. This is called before start().
     */
    @Override
    public void init() {
        System.out.printf("init() called on thread %s%n",
                Thread.currentThread());
    }

    /**
     * Start is where your code goes in a typical application.
     * @param primaryStage the main stage provided by JavaFX
     */
    @Override
    public void start(Stage primaryStage) {
        System.out.printf("start() called on thread %s%n",
                Thread.currentThread());
        Platform.exit(); // the stop() will be called.
    }

    /**
     * We're done. Do any necessary cleanup.
     */
    @Override
    public void stop() {
        System.out.printf("stop() called on thread %s%n",
                Thread.currentThread());
    }
}
Example 1: JavaFX life cycle demonstrated.
Sample output is provided below.
init() called on thread Thread[#25,JavaFX-Launcher,5,main]
start() called on thread Thread[#23,JavaFX Application Thread,5,main]
stop() called on thread Thread[#23,JavaFX Application Thread,5,main]
It is important to recognize that it is the architecture of Application that drives the order of execution of the methods. Although Example 1 declares the methods in the order init(), start() then stop(), the order of the declarations has no impact on the order of execution.
Now, we will consider a basic template for a simple JavaFX program. One possible template for a JavaFX application could look like Example 2.
import javafx.application.Application;
import javafx.stage.Stage;
import javafx.scene.Scene;
import javafx.scene.layout.VBox;

public class JavaFXTemplate extends Application {

    @Override
    public void start(Stage primaryStage) {
        // code goes here!
        VBox vbox = new VBox();
        Scene scene = new Scene(vbox, 300, 200);
        primaryStage.setTitle("JavaFX Template");
        primaryStage.setScene(scene);
        primaryStage.show();
    }

    public static void main(String[] args) {
        // we still use main(), but it's only to call launch().
        launch(args);
    }
}
Example 2: A JavaFX template.
Although we have not yet discussed layouts, one is necessary to create a Scene and put it on the Stage. Our window is 300 pixels wide by 200 pixels tall.
The code in Example 2 will display a decorated window as in Figure 1.
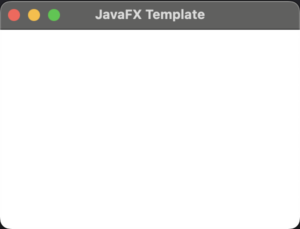
Figure 1: Window displayed when the primaryStage is shown.
main() method that is technically not required. It’s provided here and in other examples as a reminder of where things begin.
Recall, however, that init(), start(), and stop() are actually running the show here. The use of the main() method is only absolutely necessary if you are passing arguments from the command line.
Dialogs
The class Dialog and three subclasses Alert, ChoiceDialog and TextInputDialog were added starting in Java 8u40.
Several examples of dialogs are shown below. You will begin to notice a pattern with these examples. Specifically, certain methods are frequently called for each type of dialog. You will also note the absence of Platform.exit() as it is not necessary to demonstrate the different kinds of Dialog.
import javafx.application.Application;
import javafx.scene.control.Alert;
import javafx.scene.control.Alert.AlertType;
import javafx.stage.Stage;

public class TestAlert extends Application {

    @Override
    public void start(Stage primaryStage) throws Exception {

        Alert alert = new Alert(AlertType.ERROR);
        alert.setTitle("Error Dialog");
        alert.setHeaderText("Unrecoverable error!");
        alert.setContentText("The application needs to close.");

        alert.showAndWait();
    }
}
Example 3: Alert dialog.
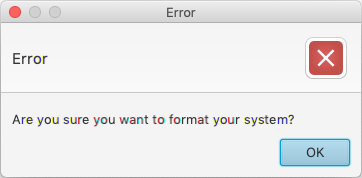
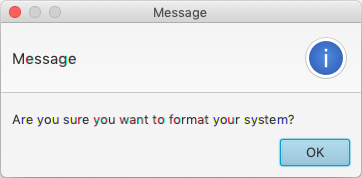
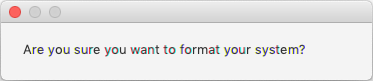
| Value of AlertType | Example |
|---|---|
AlertType.ERROR |
 |
AlertType.INFORMATION |
 |
AlertType.NONE |
 |
AlertType.CONFIRMATION |
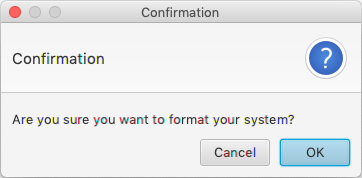 |
AlertType.WARNING |
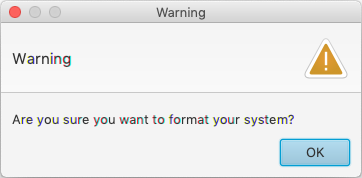 |
Table 2: Enumerated list of AlertType values.
import javafx.application.Application;
import javafx.scene.control.ChoiceDialog;
import javafx.stage.Stage;
import java.util.Optional;

public class TestChoiceDialog extends Application {

    @Override
    public void start(Stage primaryStage) {
        // array of choices
        String[] days = { "Sunday", "Monday", "Tuesday", "Wednesday",
                "Thursday", "Friday", "Saturday" };

        // populate the dialog options with Monday as the default.
        ChoiceDialog<String> dialog = new ChoiceDialog<>(days[1], days);
        dialog.setTitle("Choice Dialog");
        dialog.setHeaderText("Which day would you prefer delivery?");
        dialog.setContentText("Choose the day:");

        // prompt and get choice.
        Optional<String> result = dialog.showAndWait();
        if (result.isPresent())
            System.out.println("Your choice: " + result.get());
    }
}
Example 4: Using a ChoiceDialog.
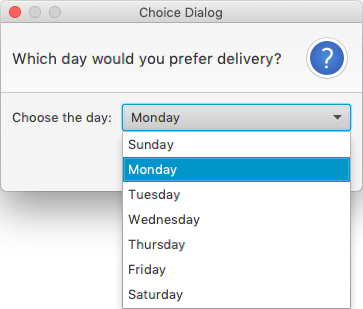
Figure 2: ChoiceDialog showing preferred choice already selected.
import javafx.application.Application;
import javafx.scene.control.TextInputDialog;
import javafx.stage.Stage;
import java.util.Optional;

public class TestTextInputDialog extends Application {

    @Override
    public void start(Stage primaryStage) {
        // create dialog with default text
        TextInputDialog dialog = new TextInputDialog("default name");
        dialog.setTitle("Text Input Dialog");
        dialog.setHeaderText("We need a little more information.");
        dialog.setContentText("Please enter your name:");

        // prompt and get choice.
        Optional result = dialog.showAndWait();
        if (result.isPresent()){
            System.out.println("Your name: " + result.get());
        }
    }
}
Example 5: Using TextInputDialog.
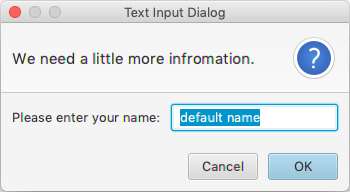
Figure 3: TextInputDialog with default text.
JavaFX Application
The JavaFX application is built on a hierarchy. Figure 4 shows the basic layering of a JavaFX application.
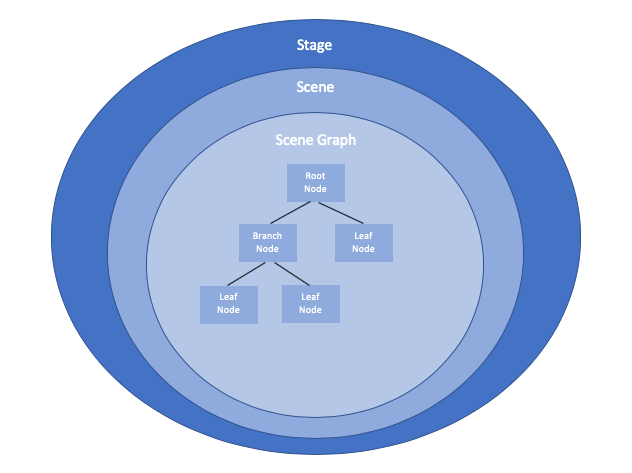
Figure 4: JavaFX application hierarchy.
The stage is the window we are displaying. It contains all the objects of the JavaFX application. The stage is constructed by the Stage class available in the javafx.stage package.
The scene contains the scene graph which is displayed on the stage. The scene is constructed by the Scene class available in the javafx.scene package.
The scene graph is a hierarchical structure of nodes that define the scene as is plays out on the stage. Rather than create actual Node objects (the Node class is defined in javafx.scene), we create nodes as specific objects like buttons, check boxes, text areas, layout panes and media.
The Stage
We will begin the discussion of the stage by reiterating the code from Example 2 with a bit more detail. This is shown in Example 6.
import javafx.application.Application;
import javafx.application.Platform;
import javafx.stage.Stage;
import javafx.scene.Scene;
import javafx.scene.layout.VBox;

public class BasicStage extends Application {

    @Override
    public void start(Stage primaryStage) {
        // code goes here!
        VBox vbox = new VBox();
        Scene scene = new Scene(vbox, 300, 200);
        primaryStage.setTitle("JavaFX Template");
        primaryStage.setScene(scene);
        primaryStage.show();
    }
}
Example 6: Just a basic stage.
The size of the stage is 300 pixels wide by 200 pixels high. Of course, a stage should have a scene. And, like a traditional scene performed on a stage, scenes are often made up of various characters.
The scene in this example is what drives the stage size. The code in Example 6 also shows how we can assign a title to the window before showing it. Remember that we must call show() before we will see the window. Upon closing the window, the program terminates.
You can have many stages. However, careful planning is necessary to ensure your stages behave as you desire. Multiple stages are beyond the scope of this introductory chapter.
The Scene
Having a stage is a beautiful thing! You can hold any performance on that stage. However, without a planned scene of what you wish to take place, the stage is an empty place. This is true both in the theater and in JavaFX. You must create a scene to be displayed on the stage. The scene contains a cast of characters who will carry out whatever needs to happen in the performance.
But it all starts with a scene. Recall the scene graph from Figure 4. It lists the nodes contained within the scene and shows their relationship to each other – root, branch and leaf. That scene graph could also be written as:
Stage
|-> Scene
    |-> Root Node
        |-> Leaf Node
        |-> Branch Node
            |-> Leaf Node
            |-> Leaf Node
The scene needs a root – a place to hang all the other components. We will use a simple VBox. A VBox is a kind of Layout, and these will be discussed later.
[NOTE: You may find some examples from other sources like to use Group for their basic examples. Frankly, the Group examples are misleading leaving you to think that working with Group is simple. Far from it. With Group, you are responsible for placing the nodes within the viewable scene. Therefore we will begin with an example that does the placement for us until we are ready to talk about arranging the scene.]
We will create a Label, TextField and a Button. Placing them in the VBox layout will automatically stack the objects vertically within the scene. This is demonstrated in Example 7a.
import javafx.application.Application;
import javafx.stage.Stage;
import javafx.scene.Scene;
import javafx.scene.control.Label;
import javafx.scene.control.TextField;
import javafx.scene.control.Button;
import javafx.scene.layout.VBox;

public class SetTheScene1 extends Application {

    @Override
    public void start(Stage primaryStage) {
        // all the things
        Label label;
        TextField tf;
        Button button;
        VBox vbox;
        Scene scene;

        // create some objects
        label = new Label("Label:");
        button = new Button("Button!");
        tf = new TextField("Text Field!");

        // creat the VBox and add them in order
        vbox = new VBox(label, tf, button);
        scene = new Scene(vbox, 300, 200);

        // and go!
        primaryStage.setTitle("A Simple Scene!");
        primaryStage.setScene(scene);
        primaryStage.show();
    }
}
Example 7a: Setting the Scene with VBox.
Not let us describe what it going on. Lines 15-18 declare the components for managing the scene. The VBox is our root node while the Label, TextField and Button are leaf nodes. Lines 21-23 create the object and assign text values to each object. Line 25 creates the VBox object providing the label, tf and button variables to be placed in the VBox in that order.
Ultimately we are creating a scene graph like the following:
Stage
|-> Scene
    |-> VBox
        |-> Label
        |-> TextField
        |-> Button
The program creates a window like that in Figure 5a.
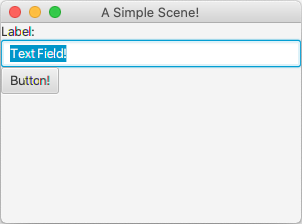
Figure 5a: The stacked components of the VBox.
We try to pretty things up a bit in the following example and make it more presentable.
import javafx.application.Application;
import javafx.stage.Stage;
import javafx.scene.Scene;
import javafx.scene.control.Label;
import javafx.scene.control.TextField;
import javafx.scene.control.Button;
import javafx.scene.layout.VBox;
import javafx.geometry.Pos;

public class SetTheScene2 extends Application {

    @Override
    public void start(Stage primaryStage) {
        // all the things
        Label label;
        TextField tf;
        Button button;
        VBox vbox;
        Scene scene;

        // create some objects
        label = new Label("Label:");
        button = new Button("Button!");
        tf = new TextField("Text Field!");
        tf.setMaxWidth(200);

        // creat the VBox and add them in order
        vbox = new VBox(label, tf, button);
        // but this time let's make them pretty
        vbox.setSpacing(20);
        vbox.setAlignment(Pos.CENTER);
        scene = new Scene(vbox, 300, 200);

        // and go!
        primaryStage.setTitle("A Simple Scene!");
        primaryStage.setScene(scene);
        primaryStage.show();
    }
}
Example 7b: Setting the Scene with VBox and some minor additional formatting.
This introduces the Pos class (line 8) which allows us to specify how some things can be arranged vertically.
Table 4a shows how we can provide guidance on where items can be positioned. With the exception of CENTER, all positions are created by combining the prefixes BASELINE, BOTTOM, TOP and CENTER with the suffixes _CENTER, _LEFT and _RIGHT.
Constants Defining Poistion Using Pos. |
|---|
Pos.CENTERPositions horizontally and vertially center. |
Pos.BASELINE_LEFTPositions vertically baseline (top) and horizontally left. |
Pos.TOP_CENTERPositions vertically top and horizontally center. |
Pos.BOTTOM_RIGHTPositions vertically bottom and horizontally right. |
Table 4a: Some of the constants defined by the enumeration Pos.
At line 25 we restrict how wide the TextField will be rather than the default of occupying the width of the VBox. We add additional spacing, also known as padding, at line 28. This avoids the objects being crowded together. Finally, line 29 centers the nodes vertically and horizontally.
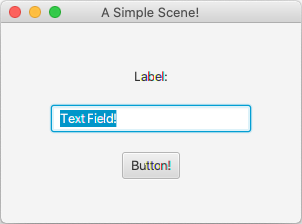
Figure 5b: The stacked components of the VBox with some additional formatting.
The following table defines some constructors of the Scene class. Our examples have used the second form.
Constructors of the Scene class. |
|---|
Scene(Parent root)Creates a Scene for root. |
Scene(Parent root, double width, double height)Creates a Scene for root with the given height and width. |
Scene(Parent root, double width, double height, Paint fill)(Creates a Scene for root with the given height and width and fill. |
Scene(Parent root, Paint fill)(Creates a Scene for root with the given fill. |
Table 4b: Some constructors available in the Scene class.
Common UI Controls
Any GUI needs to have a variety of ways to offer the user choices in how information is managed. Whether you are designing a form for intake information in a doctor’s office or providing a mechanism to modify the settings for a game, you will need to have various tools to make the interface more intuitive.
Now, if you want to understand the science of interface design, one need look no further than the late Jef Raskin’s The Humane Interface. More software developers should read this book!
Below are listed a variety of user interface controls. This is not an exhaustive list. Nor is the list of constructors and methods anywhere near complete. This is intended to be introductory and two-fold in discovery. This section will use every UI control in an example program to show how they look. Later, after the layouts and events sections, we will revisit this code and lay it out a bit better, integrating button clicks to provide a better, well-rounded solution to wrap up the JavaFX discussion.
We will begin with a variarion of the code we used during the Scene discussion. This is what we are building:
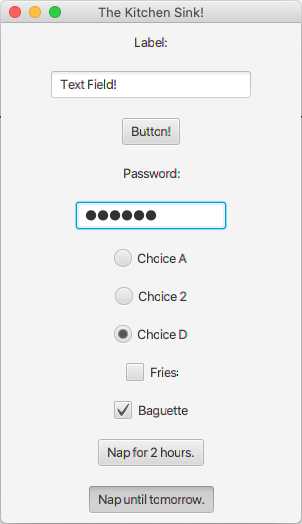
Figure 6: A pile of UI Controls.
There is no default RadioButton selected at runtime. The user entered a password, selected Choice D, the Baguette and Nap until tomorrow. The code for this is shown in Example 8.
import javafx.application.Application;
import javafx.stage.Stage;
import javafx.scene.Scene;
import javafx.scene.control.Label;
import javafx.scene.control.TextField;
import javafx.scene.control.Button;
import javafx.scene.control.PasswordField;
import javafx.scene.control.RadioButton;
import javafx.scene.control.ToggleButton;
import javafx.scene.control.CheckBox;
import javafx.scene.control.ToggleGroup;
import javafx.scene.layout.VBox;
import javafx.geometry.Pos;

public class CommonUIControls extends Application {

    @Override
    public void start(Stage primaryStage) {
        Label label, pwl;
        TextField tf;
        Button button;
        PasswordField pwf;
        RadioButton rb1, rb2, rb3;
        CheckBox cb1, cb2;
        ToggleButton tb1, tb2;
        ToggleGroup tg1, tg2;
        VBox vbox;
        Scene scene;

        //Basic controls
        label = new Label("Label:");
        button = new Button("Button!");
        tf = new TextField("Text Field!");
        tf.setMaxWidth(200);

        // PasswordField
        pwl = new Label("Password:");
        pwf = new PasswordField();
        pwf.setMaxWidth(150);

        // RadioButton code
        rb1 = new RadioButton("Choice A");
        rb2 = new RadioButton("Choice 2");
        rb3 = new RadioButton("Choice D");
        tg1 = new ToggleGroup();
        rb1.setToggleGroup(tg1);
        rb2.setToggleGroup(tg1);
        rb3.setToggleGroup(tg1);

        // CheckBox code
        cb1 = new CheckBox("Fries");
        cb2 = new CheckBox("Baguette");

        // ToggleButton Code
        tb1 = new ToggleButton("Nap for 2 hours.");
        tb2 = new ToggleButton("Nap until tomorrow.");
        tg2 = new ToggleGroup();
        tb1.setToggleGroup(tg2);
        tb2.setToggleGroup(tg2);

        // load up the VBox!
        vbox = new VBox(label, tf, button, pwl, pwf, rb1, rb2, rb3, cb1, cb2, tb1, tb2);
        vbox.setSpacing(20);
        vbox.setAlignment(Pos.CENTER);
        scene = new Scene(vbox, 300, 500);

        // and go!
        primaryStage.setTitle("The Kitchen Sink!");
        primaryStage.setScene(scene);
        primaryStage.show();
    }
}
Example 8: The kitchen sink of UI controls.
While most of the code is self-explanatory, a few things should be clarified with a little review of the tables (below). The radio buttons are connected together through a ToggleGroup. The ToggleGroup only allows one radio button to be selected within the group. This allows for simpler coding whereby the programmer does not need to select a radio button when another is selected.
The ToggleButtons are also tied together with a ToggleGroup. While a ToggleButton remains depressed after being selected, if another button option were mutually exclusive, the ToggleGroup “pops” the other ToggleButton when another in the group is selected.
The Button class. |
|---|
Button()Creates a Button with no text. |
Button(String text)Creates a Button setting the button text to text. |
public final void setOnAction(EventHandler<ActionEvent> event)Assigns an event handler for the button. [Inherited from javafx.scene.control.ButtonBase] |
Table 5a: A few components of the Button class.
The Label class. |
|---|
Label()Creates a Label with no text. |
Label(String text)Creates a Label setting the label text to text. |
public final void setMinWidth(double value)Sets a specific minimum width if the default computed value does not meet the needs of the application. [Inherited from javafx.scene.layout.Region] |
public final void setMaxWidth(double value)Sets a specific maximum width if the default computed value does not meet the needs of the application. [Inherited from javafx.scene.layout.Region] |
Table 5b: A few components of the Label class.
The TextField class. |
|---|
TextField()Creates a TextField with no text. |
TextField(String text)Creates a TextField setting the default text to text. |
public final String getText()Get the current String value within the TextField. [Inherited from javafx.scene.control.TextInputControl] |
public final void setText(String text)Set the value in the TextField to text. [Inherited from javafx.scene.control.TextInputControl] |
public final void setMinWidth(double value)Sets a specific minimum width if the default computed value does not meet the needs of the application. [Inherited from javafx.scene.layout.Region] |
public final void setMaxWidth(double value)Sets a specific maximum width if the default computed value does not meet the needs of the application. [Inherited from javafx.scene.layout.Region] |
Table 5c: A few components of the TextField class.
The PasswordField class. |
|---|
PasswordField()Creates a PasswordField that does not display contents. |
public final String getText()Get the current String value within the PasswordField. [Inherited from javafx.scene.control.TextInputControl] |
public final void setText(String text)Set the value in the PasswordField to text. [Inherited from javafx.scene.control.TextInputControl] |
public final void setMinWidth(double value)Sets a specific minimum width if the default computed value does not meet the needs of the application. [Inherited from javafx.scene.layout.Region] |
public final void setMaxWidth(double value)Sets a specific maximum width if the default computed value does not meet the needs of the application. [Inherited from javafx.scene.layout.Region] |
Table 5d: A few components of the PasswordField class.
The CheckBox class. |
|---|
CheckBox()Creates a CheckBox with no label value. |
CheckBox(String text)Creates a CheckBox setting the label to text. |
Table 5e: A few components of the CheckBox class.
The RadioButton class. |
|---|
RadioButton()Creates a RadioButton with no label value. |
RadioButton(String text)Creates a RadioButton setting the label to text. |
public final void setToggleGroup(ToggleGroup value)Sets the ToggleGroup for the RadioButton. [Inherited from javafx.scene.layout.Region] |
Table 5f: A few components of the RadioButton class.
The ToggleButton class. |
|---|
ToggleButton()Creates a RadioButton with no label value. |
ToggleButton(String text)Creates a ToggleButton setting the label to text. |
public final void setToggleGroup(ToggleGroup value)Sets the ToggleGroup for the ToggleButton. [Inherited from javafx.scene.layout.Region] |
Table 5g: A few components of the ToggleButton class.
The ToggleGroup class. |
|---|
ToggleGroup()Creates a ToggleGroup for RadioButton or ToggleButton objects. |
public final Toggle getSelectedToggle()Returns the currect selected Toggle for the ToggleGroup. |
Table 5h: A few components of the ToggleGroup class.
Layouts
We have already seen an introductory layout used in the Scene section. There we introduced the VBox layout.
Layouts help to determine how nodes will be placed within the scene graph. In this section we will introduce a few layout options. These include Group, HBox, VBox, GridPane, BorderPane and FlowPane.
The HBox Layout
import javafx.application.Application;
import javafx.stage.Stage;
import javafx.scene.Scene;
import javafx.scene.layout.HBox;
import javafx.scene.control.Label;
import javafx.scene.control.TextField;

public class HBoxDemo extends Application {

    @Override
    public void start(Stage primaryStage) {
        // create HBox and add new objects
        HBox hb = new HBox(10, new Label("First Name:"), new TextField());
        Scene scene = new Scene(hb, 550, 70);

        // add additional objects to HBox
        hb.getChildren().addAll(new Label("Last Name:"), new TextField());

        // and go!
        primaryStage.setScene(scene);
        primaryStage.show();
    }
}
Example 9a: A simple HBox form.

Figure 7a:
The HBox layout. |
|---|
HBox()Creates a HBox layout with a spacing of 0. |
HBox(double spacing)Creates a HBox layout with a spacing of spacing. |
HBox(Node... objects)Creates a HBox layout with a spacing of 0 and adds all the objects to the pane. |
HBox(double spacing, Node... objects)Creates a HBox layout with a spacing of spacing and adds all the objects to the pane. |
public final void setSpacing(double value)Updates the HBox layout with a spacing of value. |
public ObservableListReturns the ObservableList for the HBox. This is necessary to gain access to the add() method to add objects after the fact. [Inherited from javafx.scene.layout.Pane] |
Table 6a: A few components of the HBox class.
The VBox Layout
import javafx.application.Application;
import javafx.stage.Stage;
import javafx.scene.Scene;
import javafx.scene.layout.VBox;
import javafx.scene.control.Label;
import javafx.scene.control.TextField;

public class VBoxDemo extends Application {

    @Override
    public void start(Stage primaryStage) {
        // create VBox and add new objects
        VBox vb = new VBox(10, new Label("First Name:"), new TextField());
        Scene scene = new Scene(vb, 300, 150);

        // add additional objects to VBox
        vb.getChildren().addAll(new Label("Last Name:"), new TextField());

        // and go!
        primaryStage.setScene(scene);
        primaryStage.show();
    }
}
Example 9b: A simple VBox form.

Figure 7b:
The VBox layout. |
|---|
VBox()Creates a VBox layout with a spacing of 0. |
VBox(double spacing)Creates a VBox layout with a spacing of spacing. |
VBox(Node... objects)Creates a VBox layout with a spacing of 0 and adds all the objects to the pane. |
VBox(double spacing, Node... objects)Creates a VBox layout with a spacing of spacing and adds all the objects to the pane. |
public final void setSpacing(double value)Updates the VBox layout with a spacing of value. |
public ObservableListReturns the ObservableList for the VBox. This is necessary to gain access to the add() method to add objects after the fact. [Inherited from javafx.scene.layout.Pane] |
Table 6b: A few components of the VBox class.
The GridPane Layout
import javafx.application.Application;
import javafx.stage.Stage;
import javafx.scene.Scene;
import javafx.scene.control.Label;
import javafx.scene.control.TextField;
import javafx.scene.layout.GridPane;
import javafx.geometry.Pos;

public class GridPaneDemo extends Application {

    @Override
    public void start(Stage primaryStage) {
        // all the things we need.
        Label l1, l2, l3;
        TextField tf1, tf2, tf3;
        GridPane pane = new GridPane();
        Scene scene = new Scene(pane, 300, 200);

        // create the labels and text fields
        l1 = new Label("Label 1");
        l2 = new Label("Label 2");
        l3 = new Label("Label 3");
        tf1 = new TextField("Text Field 1");
        tf2 = new TextField("Text Field 2");
        tf3 = new TextField("Text Field 3");

        // set pane object gaps and alignment
        pane.setHgap(10);
        pane.setVgap(10);
        pane.setAlignment(Pos.CENTER);

        // remember that column is first then row!
        pane.add(l1, 0, 0);
        pane.add(tf1, 1, 0);
        pane.add(l2, 0, 1);
        pane.add(tf2, 1, 1);
        pane.add(l3, 0, 2);
        pane.add(tf3, 1, 2);

        // and go!
        primaryStage.setTitle("GridPane");
        primaryStage.setScene(scene);
        primaryStage.show();
    }
}
Example 9c: A simple GridPane form.
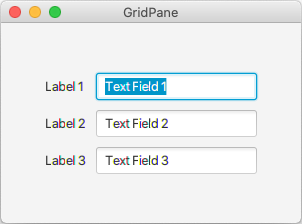
Figure 7c:
The GridPane layout. |
|---|
GridPane()Creates a GridPane layout with a hgap and vgap of 0 and TOP_LEFT alignment. |
public void add(Node child, int column, int row)Add child to at row and column position. |
public void add(Node child, int column, int row, int colspan, rowspan)Add child to at row and column position spanning colspan columns and rowspan rows. |
Table 6c: A few components of the GridPane class.
Events
Events are something that can happen at any given time. In a GUI application, we cannot expect the user to follow a given procedure like a traditionally written, text-based program. The whole idea of a GUI is to allow the user the opportunity to fill out portions of the form as they see fit. Depending on the application, they can submit some or all of the possible field information.
That being said, we need to approach how we handle the GUI a bit differently. Many events can occur, from filling in fields to mousing over an area to clicking a button to submit a form. All of these or even none of these can have actions associated with the event. Our job is to determine how our application should react to these events.
Three elementary examples will be provided to demonstrate how we can react to a button press. Since a button press does not involve the keyboard or the bevy of mouse-specific events, we will use the generic ActionEvent class to represent the event. In addition, we will use the EventHandler class to be able to assign an object to the Button.
A Button object can have the setOnAction() method invoked. When this is done, a reference to an object that implements EventHandleris passed. Specifically, the Button wants EventHandler. This then becomes the mechanism for handling the button press.
The use of the EventHandler interface (or any interface for that matter) means we agree to a specific contract as spelled out by the interface. In other words, we typically agree to supply a set of methods that can be accessed at runtime. The interface spells out the details – just like a contract spells out how two entities shall conduct business. The compiler enforces the rules of the agreement before it can become an issue at runtime. So the compiler essentially makes sure that all parties are keeping up their end of the deal.
For our sake, the only thing we need to do is provide a void method called handle() which handles the work to be done when the event occurs. Examples 10a and 10b show two different ways to implement this usign a class. Example 10c uses a Lambda expression.
We will be doing some additional formatting of controls within the pane so we will also introduce the HPos enumeration. Table 7a shows the constants available in HPos. This is similar to the Pos enumeration we used during our discussion of UI controls. HPos can only have an affect on horizontal positioning.
Constants Defining Poistion Using HPos. |
|---|
HPos.CENTERPositions horizontally center. |
HPos.LEFTPositions horizontally left. |
HPos.RIGHTPositions horizontally right. |
Table 7a: The constants defined by the enumeration HPos.
The example ButtonCopyWithClass.java will produce an additional file called ButtonCopyWithClass$ButtonHandler.class.
The example ButtonCopyWithAnonClass.java will produce an additional file called ButtonCopyWithClass$1.class.
Finally, the example ButtonCopyWithLambda.java will produce no additional file.
So, in addition to the structural code changes, you will also produce different files depending on your selection.
import javafx.application.Application;
import javafx.stage.Stage;
import javafx.scene.Scene;
import javafx.scene.text.TextAlignment;
import javafx.scene.control.Label;
import javafx.scene.control.TextField;
import javafx.scene.control.Button;
import javafx.scene.layout.GridPane;
import javafx.event.EventHandler;
import javafx.event.ActionEvent;
import javafx.geometry.Pos;
import javafx.geometry.HPos;

public class ButtonCopyWithClass extends Application {

    TextField tfsrc, tfdst;

    @Override
    public void start(Stage primaryStage) {
        Label lsrc, ldst;
        Button btn;
        GridPane pane = new GridPane();
        Scene scene = new Scene(pane, 500, 200);

        lsrc = new Label("Source:");
        ldst = new Label("Destination:");
        btn = new Button("Perform the COPY");
        tfsrc = new TextField();
        tfsrc.setMinWidth(200);
        tfdst = new TextField();
        tfdst.setMinWidth(200);

        pane.setHgap(10);
        pane.setVgap(10);
        pane.setAlignment(Pos.CENTER);
        GridPane.setHalignment(btn, HPos.LEFT);
        GridPane.setHalignment(lsrc, HPos.CENTER);
        GridPane.setHalignment(ldst, HPos.CENTER);

        pane.add(lsrc, 0, 0);
        pane.add(tfsrc, 1, 0);
        pane.add(ldst, 0, 1);
        pane.add(tfdst, 1, 1);
        pane.add(btn, 1, 2);
        tfdst.setEditable(false);

        // this is where we assign the handler
        btn.setOnAction(new ButtonHandler());

        primaryStage.setTitle("Button Event Class");
        primaryStage.setScene(scene);
        primaryStage.show();
    }

    /**
     * Named class that implements the EventHandler
     */
    private class ButtonHandler implements EventHandler<ActionEvent> {
        @Override
        public void handle(ActionEvent event) {
            String s;
            // all we do is copy the text from src to dst.
            s = tfsrc.getText();
            tfdst.setText(s);
        }
    }
}
Example 10a: Using a class to support the EventHandler interface.
The first version of this uses a complete class called ButtonHandler. This model would be useful if you were developing a generic button handler for all buttons. You could then determine which button was pressed and react accordingly.
Note additional imports that are needed. Also note that the TextField reference variables are global within the class. This because the inner class, ButtonHandler, needs access to these objects later. This is considered an inner class because it is a class defined inside another class.
The following example uses an anonymous inner class.
import javafx.application.Application;
import javafx.stage.Stage;
import javafx.scene.Scene;
import javafx.scene.text.TextAlignment;
import javafx.scene.control.Label;
import javafx.scene.control.TextField;
import javafx.scene.control.Button;
import javafx.scene.layout.GridPane;
import javafx.event.EventHandler;
import javafx.event.ActionEvent;
import javafx.geometry.Pos;
import javafx.geometry.HPos;

public class ButtonCopyWithAnonClass extends Application {

    @Override
    public void start(Stage primaryStage) {
        Label lsrc, ldst;
        TextField tfsrc, tfdst;
        Button btn;
        GridPane pane = new GridPane();
        Scene scene = new Scene(pane, 500, 200);

        lsrc = new Label("Source:");
        ldst = new Label("Destination:");
        btn = new Button("Perform the COPY");
        tfsrc = new TextField();
        tfsrc.setMinWidth(200);
        tfdst = new TextField();
        tfdst.setMinWidth(200);

        pane.setHgap(10);
        pane.setVgap(10);
        pane.setAlignment(Pos.CENTER);
        GridPane.setHalignment(btn, HPos.LEFT);
        GridPane.setHalignment(lsrc, HPos.CENTER);
        GridPane.setHalignment(ldst, HPos.CENTER);

        pane.add(lsrc, 0, 0);
        pane.add(tfsrc, 1, 0);
        pane.add(ldst, 0, 1);
        pane.add(tfdst, 1, 1);
        pane.add(btn, 1, 2);
        tfdst.setEditable(false);

        // anonymous class with handle() method defined
        btn.setOnAction(new EventHandler<ActionEvent>() {
            @Override
            public void handle(ActionEvent event) {
                String s;
                // all we do is copy the text from src to dst.
                s = tfsrc.getText();
                tfdst.setText(s);
            }
        });

        primaryStage.setTitle("Button Event Inner Class");
        primaryStage.setScene(scene);
        primaryStage.show();
    }
}
Example 10b: Using an inner class to support the EventHandler interface.
The anonymous inner class is only beneficial when you know this class is a one-shot deal, will not be used again, and therefore needs no formal name like ButtonHandler from the previous example.
The upside is that the text fields no longer need to be global to the class. The downside to the anonymous inner class is that it is complicated to write and makes it look like the EventHandler is an actual class with a default constructor rather than an interface. This can make understanding and debugging the program somewhat tricky.
The following example uses a Lambda expression.
import javafx.application.Application;
import javafx.stage.Stage;
import javafx.scene.Scene;
import javafx.scene.text.TextAlignment;
import javafx.scene.control.Label;
import javafx.scene.control.TextField;
import javafx.scene.control.Button;
import javafx.scene.layout.GridPane;
import javafx.geometry.Pos;
import javafx.geometry.HPos;

public class ButtonCopyWithLambda extends Application {

    @Override
    public void start(Stage primaryStage) {
        Label lsrc, ldst;
        TextField tfsrc, tfdst;
        Button btn;
        GridPane pane = new GridPane();
        Scene scene = new Scene(pane, 500, 200);

        lsrc = new Label("Source:");
        ldst = new Label("Destination:");
        btn = new Button("Perform the COPY");
        tfsrc = new TextField();
        tfsrc.setMinWidth(200);
        tfdst = new TextField();
        tfdst.setMinWidth(200);

        pane.setHgap(10);
        pane.setVgap(10);
        pane.setAlignment(Pos.CENTER);
        GridPane.setHalignment(btn, HPos.LEFT);
        GridPane.setHalignment(lsrc, HPos.CENTER);
        GridPane.setHalignment(ldst, HPos.CENTER);

        pane.add(lsrc, 0, 0);
        pane.add(tfsrc, 1, 0);
        pane.add(ldst, 0, 1);
        pane.add(tfdst, 1, 1);
        pane.add(btn, 1, 2);
        tfdst.setEditable(false);

        // lambda expressoion where only the action is defined
        btn.setOnAction(event -> {
            String s;
            // all we do is copy the text from src to dst.
            s = tfsrc.getText();
            tfdst.setText(s);
        });

        primaryStage.setTitle("Button Event Lambda");
        primaryStage.setScene(scene);
        primaryStage.show();
    }
}
Example 10c: Using a Lambda expression to support the EventHandler interface.
Since we have not yet spoken of Lambda expressions, we will first note that Lambda expressions are unique, were introduced in Java 8, and cannot be used everywhere. Only in particular instances can this be done.
The reason we can use it here is due to very specific knowledge regarding Button. Button expects that the setOnAction() method will have been passed an object that implements EventHandler. And, as previously mentioned, there is only one method implemented – handle().
In Java, Lambda expressions terms, EventHanlder is a functional interface. A functional interface is an interface that has only one abstract method. In this case it is handle(). As it is the only method defined, we do not even need to use its name as it is understood that we are overriding the only method available.
The name event is a parameter representing the ActionEvent being passed to the method. The compiler handles all the details to the point that in this example we are no longer importing EventHandler and ActionEvent!
So which should you use? The anonymous inner class (second version) will likely be the least frequently used. The named inner class (first version) is pretty traditional as it has consistent with how things are done in Swing, making it quite common. The Lambda expression model has limited use because of the specific criteria surrounding when it can be used. It is a pretty powerful tool and should be sought whenever possible.
Graphics
This section provides a rudimentary exposition of the JavaFX Graphics library. It is provided as part of a deeper understanding of graphical environments and ties into the CodeBreaker game provided in the interludes (q.v).
We have been talking about labels and buttons and text fields and all sorts of things you would see in a typical GUI form. Now we want to draw shapes and lines, which will require something different. We will begin by talking about Shape. The Shape class is just a base class from which all other shapes are derived.
We will not be instantiating Shape directly, but Table 6 lists some of the methods that we will employ.
Shape class methods |
Paint getFill()Method to return the current fill property. |
Paint getStroke()Method to return the current stroke property. |
void setFill(Paint value)Method to set the fill to value. |
void setStroke(Paint value)Method to set the stroke to value. |
Table 6: Some methods of the Shape class.
As we said, the Shape class is the basis of many available shapes. These include Line, Circle, Rectangle and Polygon. All of which we will use in the next few examples. We will start with the basics.
Line constructors |
Line()Creates an Line object with no coordinate properties. |
Line(double startX, double startY, double endX, double endY)Creates a line from ( startX,startX) to (endX,endY). |
Table 7: Constructors of the Line class.
Creating a line is pretty simple. We can use the second constructor form to specify the start and end coordinate points. After that we can add it to the Group.
import javafx.application.Application;
import javafx.stage.Stage;
import javafx.scene.Scene;
import javafx.scene.shape.Line;
import javafx.scene.shape.Circle;
import javafx.scene.shape.Rectangle;
import javafx.scene.Group;
import javafx.scene.paint.Color;

public class FXGraphicsEx1 extends Application {

    @Override
    public void start(Stage primaryStage) {
        Group group;
        Scene scene;
        Line line;
        Rectangle rect;
        Circle cir;

        group = new Group();
        scene = new Scene(group, 400, 400, Color.LIGHTGRAY);

        line = new Line(10, 20, 100, 40);
        group.getChildren().add(line);

        line = new Line(390, 20, 290, 40);
        group.getChildren().add(line);

        rect = new Rectangle(100, 100, 50, 50);
        rect.setStroke(Color.RED);
        rect.setFill(Color.TRANSPARENT);
        group.getChildren().add(rect);

        cir = new Circle(275, 125, 25,Color.TRANSPARENT);
        cir.setStroke(Color.RED);
        group.getChildren().add(cir);

        cir = new Circle(125, 185, 25,Color.TRANSPARENT);
        cir.setStroke(Color.YELLOW);
        group.getChildren().add(cir);

        rect = new Rectangle(250, 160, 50, 50);
        rect.setStroke(Color.YELLOW);
        rect.setFill(Color.TRANSPARENT);
        rect.setArcWidth(10);
        rect.setArcHeight(10);
        group.getChildren().add(rect);

        rect = new Rectangle(100, 220, 50, 50);
        group.getChildren().add(rect);

        cir = new Circle(275, 245, 25);
        group.getChildren().add(cir);

        cir = new Circle(125, 305, 25, Color.BLUE);
        group.getChildren().add(cir);

        rect = new Rectangle(250, 280, 50, 50);
        rect.setFill(Color.BLUE);
        rect.setArcWidth(10);
        rect.setArcHeight(10);
        group.getChildren().add(rect);

        primaryStage.setTitle("FXGraphicsEx1");
        primaryStage.setScene(scene);
        primaryStage.show();
    }
}
Example 11a: A program utilizing Graphics to draw basic shapes.
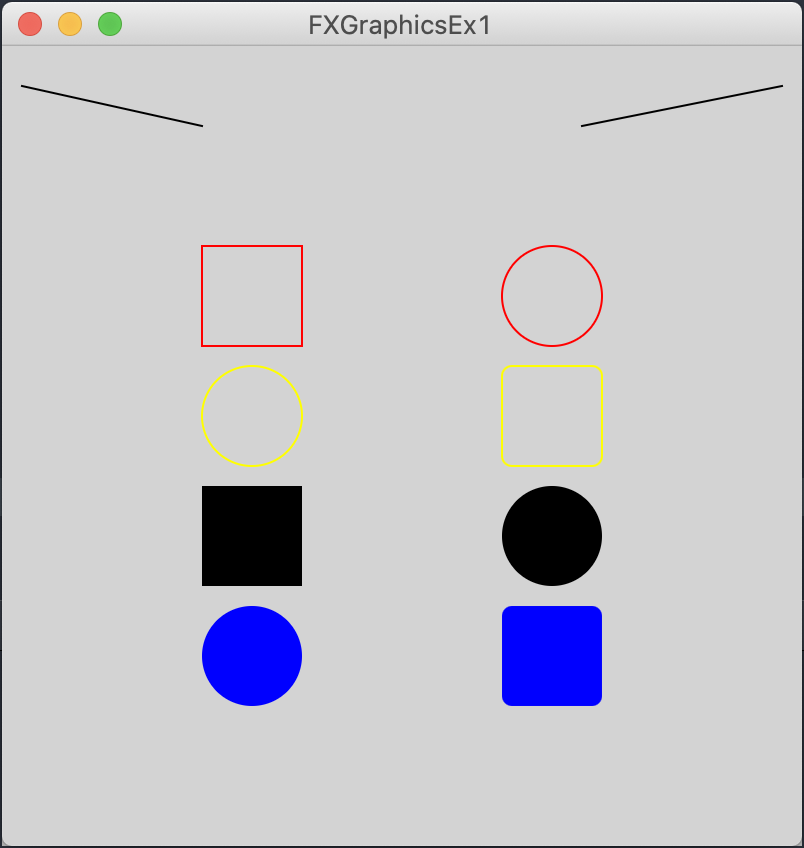
The code shown in Example 11a is designed to jump right in and start drawing. Remember coordinate geometry? The basic coordinate system is based on the origin (0,0) at the upper left-hand corner of the content pane. So, if you remember coordinate geometry, we are operating in Quadrant IV except all the x and y values are positive and move away from the origin.
The code in Example 11a produces the following graphic.
The next few tables describe some common Graphics methods and the color constants.
Drawing methods from the Graphics abstract class. |
|---|
abstract void drawLine(int x1, int y1, int x2, int y2)Draws a line in the current color from ( x1,y1) to (x2,y2). |
abstract void drawOval(int x, int y, int width, int height)Draws an oval in the current color of width and height using (x,y) as the top left origin. |
abstract void drawPolygon(int[] xPoints, int[] yPoints, int nPoints)Draws a closed polygon in the current color using the count of nPoints specified in the xPoints and yPoints arrays. |
void drawRect(int x, int y, int width, int height)Draws a hollow rectangle of width and height in the current color using (x,y) as the top left origin. |
abstract void drawRoundRect(int x, int y, int width, int height, int arcWidth, int arcHeight)Draws a hollow rectangle of width and height in the current color using (x,y) as the top left origin. The arcWidth and arcHeight values are used to determine the rouding of the corners. |
abstract void drawString(String str, int x, int y)Draws text in str using the current color and font weight starting at (x,y). |
Table 7: Some of the draw methods of the Graphics abstract class.
The following table defines some methods used for drawing filled graphic objects.
Fill methods from the Graphics abstract class. |
|---|
abstract void fillArc(int x, int y, int width, int height, int startAngle, int arcAngle)Fills an elliptical or circular arc using the current color and ( x,y) as the top left origin. |
abstract void fillOval(int x, int y, int width, int height)Fills an oval in the current color of width and height using (x,y) as the top left origin. |
abstract void fillPolygon(int[] xPoints, int[] yPoints, int nPoints)Fills a closed polygon in the current color using the count of nPoints specified in the xPoints and yPoints arrays. |
abstract void fillRect(int x, int y, int width, int height)Fills a rectangle of width and height in the current color using (x,y) as the top left origin. |
abstract void fillRoundRect(int x, int y, int width, int height, int arcWidth, int arcHeight)Fills a rectangle of width and height in the current color using (x,y) as the top left origin. The arcWidth and arcHeight values are used to determine the rouding of the corners. |
Table 8: Some of the fill methods of the Graphics abstract class.
Color is a class defined in java.awt.Color. Some of the common colors are noted below.
Constructor and a few constants from Color. |
|---|
Color(int r, int g, int b)Constructor for a custom color specifying the levels of Red, Gree and Blue. |
Color.BLACK and Color.black |
Color.RED and Color.red |
Color.LIGHT_GRAY and Color.lightGray |
Color.YELLOW and Color.yellow |
Table 9: Some of the constants defined by the Color class.
We used a drawing and a grid system to render some art for the following example. You can click on the image below to see the full-size picture.
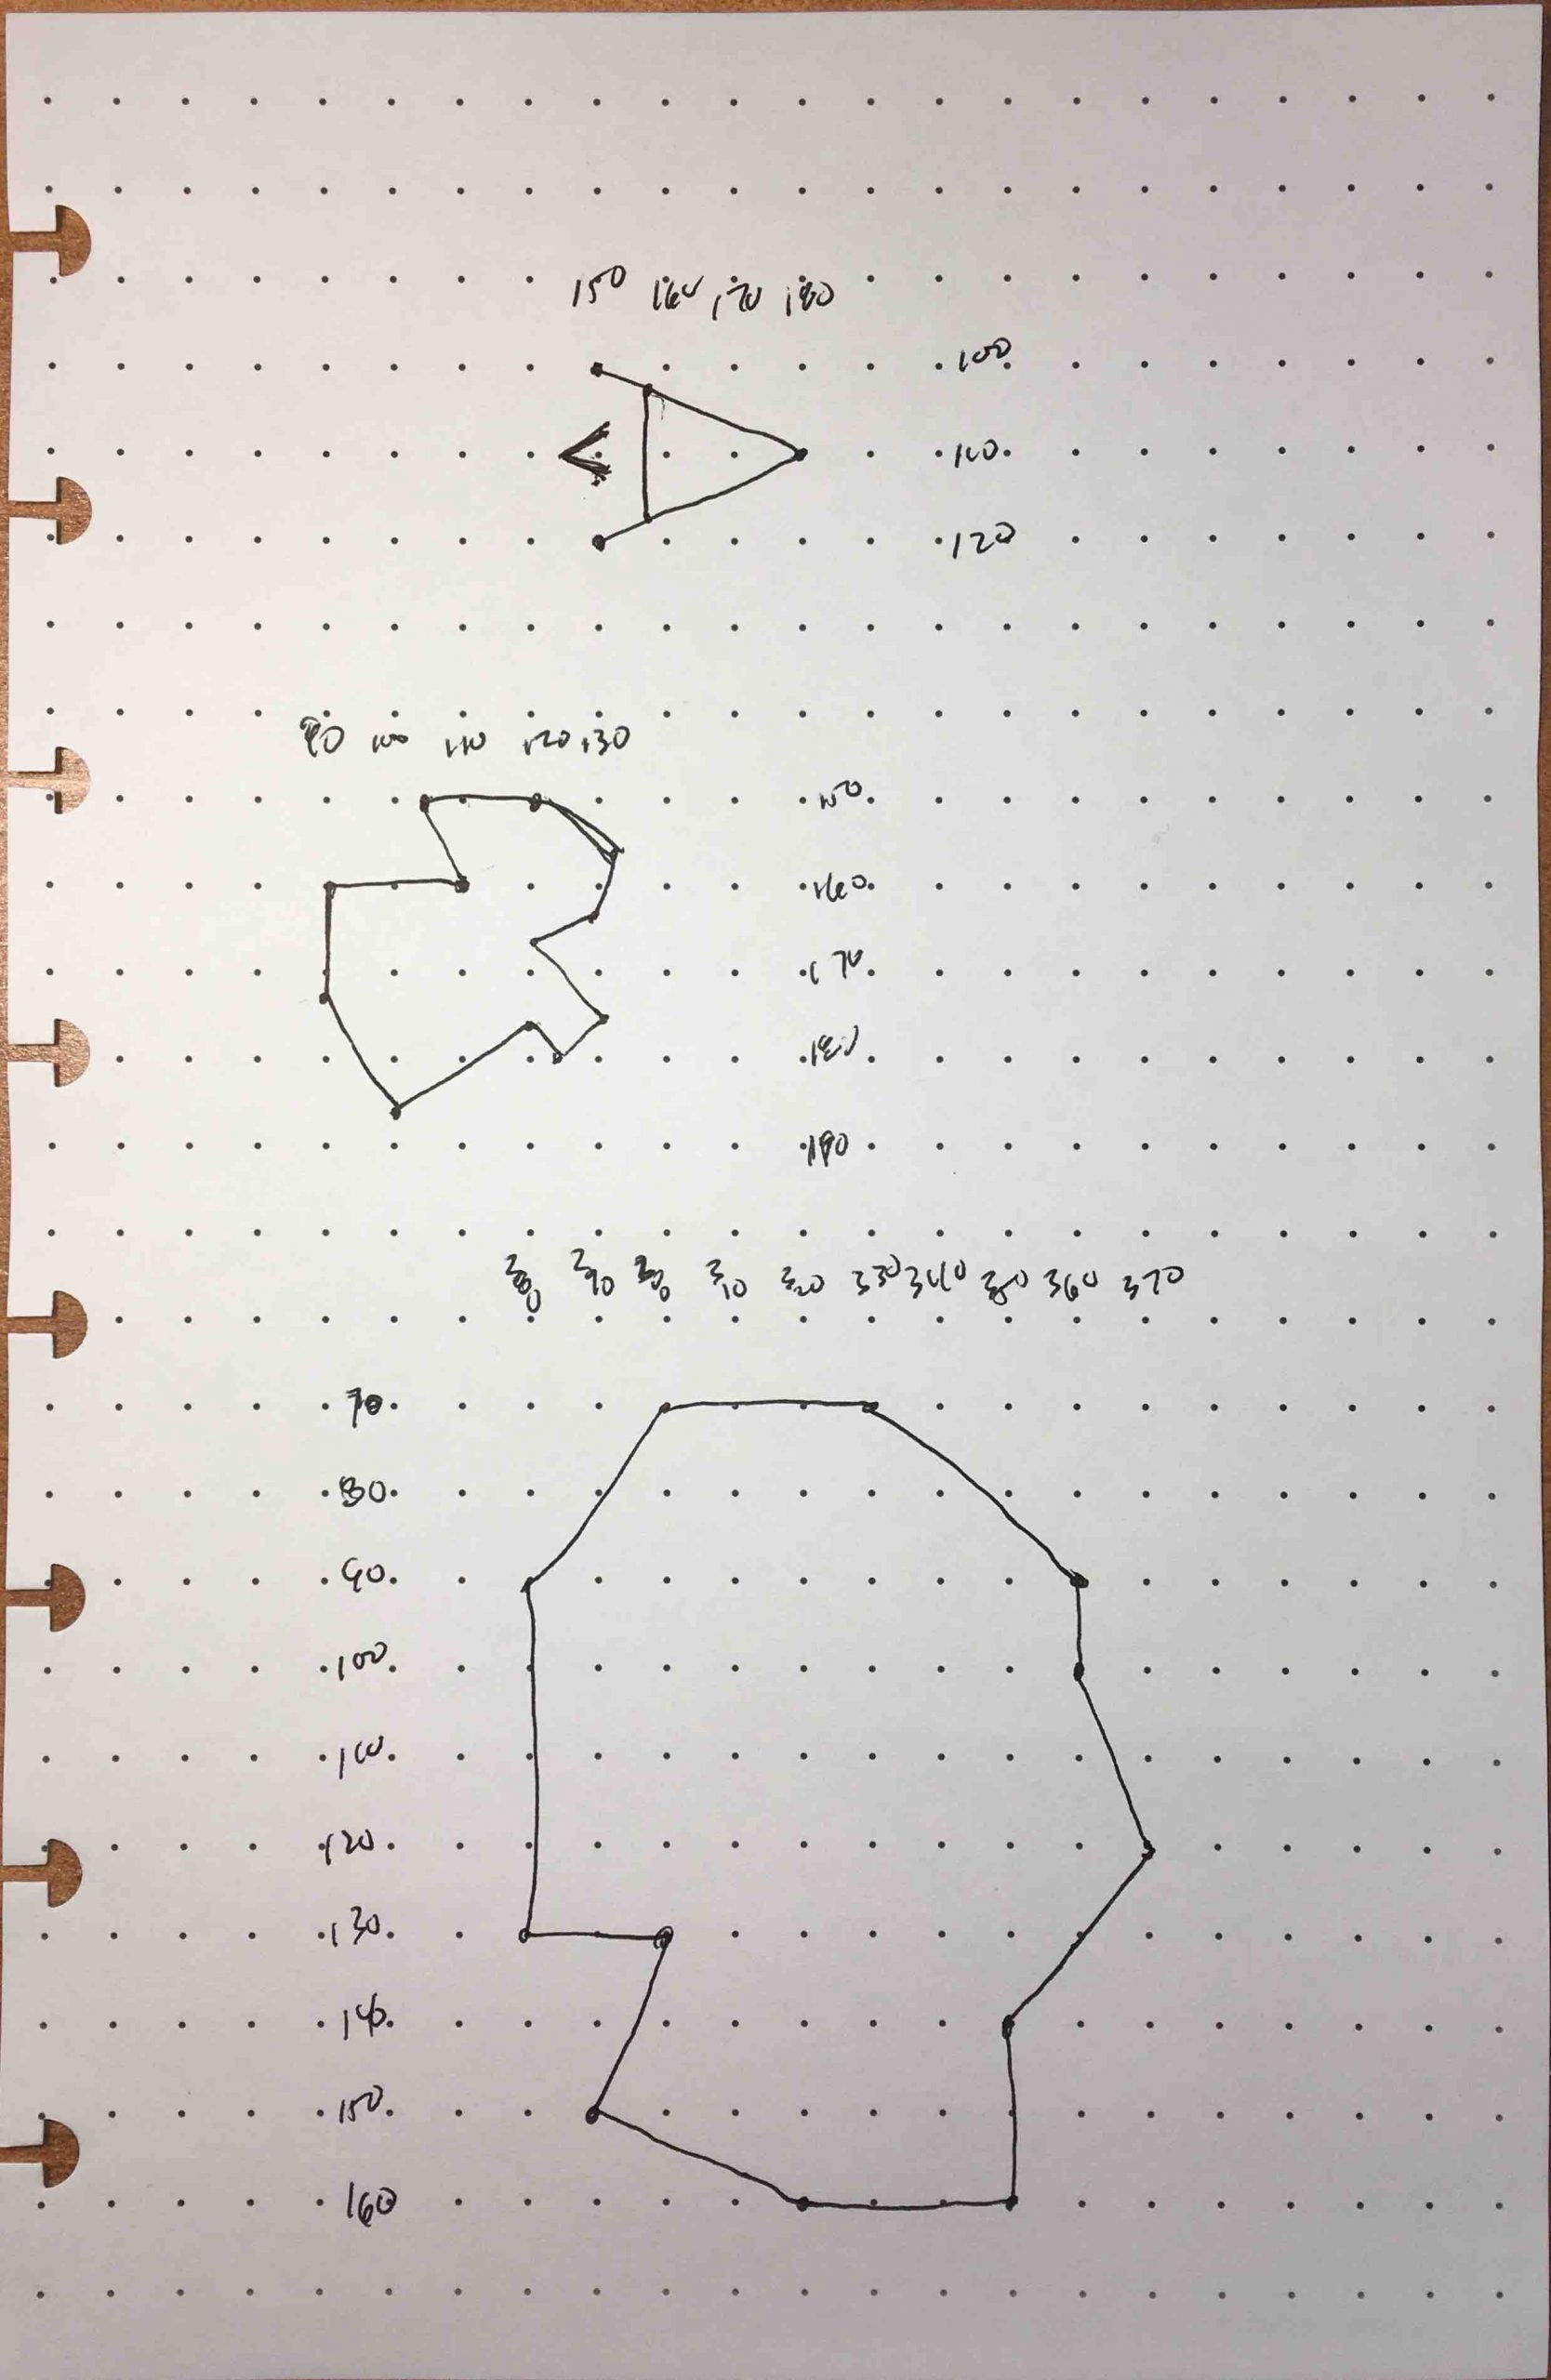
The drawing is a few freehand shapes from an old game called Asteroids. You would fly around space to blow up the asteroids before they crushed your ship. As an omage to a once great game, we now have a piece of Java code that captures these images. Using the coordinate system on the drawing, the drawLine() method was used to create the ship while the drawPolygon() method was used to create the two asteroids.
import javafx.application.Application;
import javafx.stage.Stage;
import javafx.scene.Scene;
import javafx.scene.shape.Line;
import javafx.scene.shape.Polygon;
import javafx.scene.Group;
import javafx.scene.paint.Color;

public class FXGraphicsEx2 extends Application {

    @Override
    public void start(Stage primaryStage) {
        Group group;
        Scene scene;
        Line line;
        Polygon poly;

        group = new Group();
        scene = new Scene(group, 400, 300, Color.BLACK);

        // main ship body
        line = new Line(150,100,180,110);
        line.setStroke(Color.WHITE);
        group.getChildren().add(line);

        line = new Line(150,120,180,110);
        line.setStroke(Color.WHITE);
        group.getChildren().add(line);

        line = new Line(158,103,158,117);
        line.setStroke(Color.WHITE);
        group.getChildren().add(line);

        // jet boost
        line = new Line(153,107,145,110);
        line.setStroke(Color.WHITE);
        group.getChildren().add(line);

        line = new Line(153,113,145,110);
        line.setStroke(Color.WHITE);
        group.getChildren().add(line);

        // asteroid 1
        double[] poly1 = {280,90,280,130,300,130,290,150,320,160,350,160,350,140,370,120,360,100,360,90,330,70,300,70};
        poly = new Polygon(poly1);
        poly.setStroke(Color.WHITE);
        group.getChildren().add(poly);

        // asterpoid 2
        double[] poly2 = {90,160,90,173,100,186,120,177,123,180,130,176,120,167,130,163,132,156,120,150,103,150,110,160};
        poly = new Polygon(poly2);
        poly.setStroke(Color.WHITE);
        group.getChildren().add(poly);

        primaryStage.setTitle("FXGraphicsEx2");
        primaryStage.setScene(scene);
        primaryStage.show();
    }
}
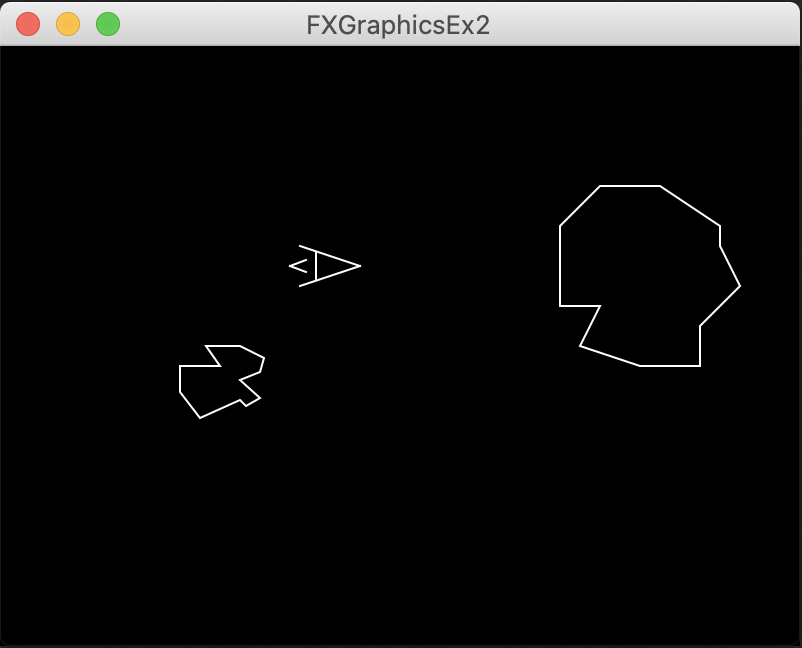
Example 11b: A program utilizing Graphics to draw a familiar video game.
The code in Example 11b creates the picture shown below.
Exercises
Rearrange the methods of Example 1 to prove the order of declaration has no impact on execution.