(Updated October 29, 2024)
Table of contents
-
Overview
Windows and
JFrameAdding Objects to
JFrameLayouts (an introduction)
Labels and Text Fields (
JLabel, JTextField)Buttons (
JButton)Event Handling
Additional Layouts
Graphics
Exercises
Overview
The first time we used the GUI was back in the Objects, Input & Output section. Recall that the javax.swing package was used to gain access to the JOptionPane class. This class allowed us to use the showInputDialog() method for prompted input returned in the form of a string and the showMessageDialog() method for displaying output.
We will now expand our knowledge of the GUI with the use of JFrame, JLabel, JTextField and JButton. These new objects will be presented in complete programs to demonstrate their use. In addition, the topics of event handling and inheritance will be introduced.
Also to be introduced is the actionListener interface. This will be used to associate work to be performed by a particular event, such as a button press.
Windows and JFrame
Let us begin with a window. The window itself can be thought of as an empty canvas. Nothing exists within the window until we place it there – except a title bar along the top and some essential window controls such as minimize, maximize and close. Many aspects of the window, in general, are not defined until we explicitly set values to manage, adjust or even make visible some particular window.
The JFrame class is what we use to create our windows. Some basic methods of JFrame are described in Table 1. Like JOptionPane, the JFrame class is part of the javax.swing package and is derived from several classes within the Abstract Window Toolkit (AWT). That is to say that JOptionPane and JFrame inherit methods from classes within the AWT. We can import these classes from the java.awt package.
JFrame methods and description |
public JFrame()Constructor for JFrame that does not set a value for the title on the newly created window. |
public JFrame(String title)Constructor for JFrame that sets the window title to title on the newly created window. |
public void setSize(int width, int height)Method to set the size of the windows to width pixels wide by height pixels high. [inherited from java.awt.Component class] |
public void setTitle(String title)Method to set the title of a window to title. [inherited from java.awt.Frame class] |
public void setVisible(boolean visible)Method to make a window visible or hidden based on the boolean value of visible. [inherited from the java.awt.Component class] |
public void setDefaultCloseOperation(int operation)Method to set the action to be taken when the use closes the window using the x button. This values for operation are EXIT_ON_CLOSE, HIDE_ON_CLOSE, DISPOSE_ON_CLOSE and DO_NOTHING_ON_CLOSE. The value EXIT_ON_CLOSE is defined within the JFrame class and all others are in the javax.swing.WindowConstants class. |
public void addWindowListener(WindowEvent e)Method to register a windows listener object to a JFrame. [inherited from java.awt.Window class] |
Table 1: Some basic methods of the JFrame class.
One way to have an application create a window is to declare an object of type JFrame. This is demonstrated in Example 1.
import javax.swing.JFrame;

public class Window1 {
   public static void main(String[] args) {
      JFrame win = new JFrame("New Window");
      win.setSize(300,200);
      win.setDefaultCloseOperation(JFrame.EXIT_ON_CLOSE);
      win.setVisible(true);
   }
}
Example 1: Sample program creating window object with a reference variable.
The first thing to note about the code in Example 1 is that we have imported the java.swing package. A JFrame object has been declared as win and has been instantiated. All of the methods of the JFrame class are called on the JFrame instance named win. The EXIT_ON_CLOSE named constant is defined within the JFrame class.
Note that the window title was set as a result of passing a string to the JFrame constructor. If we needed to change the title, we could simply call the setTitle() method and pass along a new title as a String.
It is essential that we set a window size, the default close operation and make the window visible to the user. The steps are done with the methods setSize(), setDefaultCloseOperation() and setVisible() respectively.
Although this particular program does work, it does not approach the method of programming from an object-oriented standpoint. We need to alter our thinking slightly and not think of our program as creating a window, but rather that our program is the window. Example 2 shows what we are trying to accomplish.
import javax.swing.JFrame;

public class Window2 extends JFrame {
   // Constructor for Window2 class
   public Window2() {
      setTitle("New Window");
      setSize(300,200);
      setDefaultCloseOperation(EXIT_ON_CLOSE);
      setVisible(true);
   }

   public static void main(String[] args) {
      Window2 win = new Window2();
   }
}
Example 2: Sample program that extends JFrame demonstrating inheritance.
Before we describe the details of Example 2, know that both of the previous examples produce the windows shown in Figure 1.
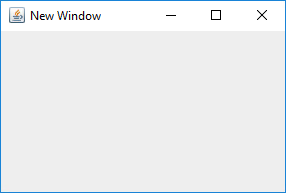
Figure 1: New window created by programs in Examples 1 and 2.
Take a close look at Example 2. By using the extends reserved word, we are telling the Java compiler that we are extending the JFrame class. This is the first step to understanding inheritance.
Extending an existing class means that we are inheriting all of the capabilities of the class being extended. The class being extended is known as the superclass and the class doing the extending is the subclass. Therefore, JFrame is our superclass and window2 is the subclass. In addition, window2 inherits all of the superclass definitions, including methods and named constants.
A review of the code in Example 2 shows some important details:
- The
main()method is not doing all of the window work it did in Example 1. Instead the main method is invoking theWindow2()constructor by instantiating aWindow2object namedwin. - The
Window2()constructor is performing all the work once done bymain(). Recall that constructors are special methods that are automatically called when we instantiate objects. - Note that all of the set methods are called as if they were
static. This is because we have direct access to theJFramemethods because of inheritance. - We also have direct access to
EXIT_ON_CLOSE, again due to inheritance.
It may seem strange at first to picture writing a program this way. Remember that we are creating classes and that classes inherit from other classes, including their properties. One goal is to get into the habit of reusing classes rather than reinventing them. Also, keep in mind that if we are creating a window, rather than treating the object as a disjoint appendage of some main() method, it is far better to treat the window as a complete entity and enjoy the benefits of inheritance and simplified programming.
Adding Objects to JFrame
By default, it used to be that we could not add content after the window was created. This is because we had not created a pathway into the window. Within the frame of the window is the content pane. The content pane is where we could add labels, fields, and buttons. This is where all window objects get together to get the required work done.
The first thing we had to do was gain access to the content pane. We did this by creating a reference variable of type Container. The Container class is available in the java.awt package and would need to imported. After that, we would call the getContentPane() method of the JFrame class. One line of code can do this as demonstrated here:
Container pane = getContentPane();
This defines the pane reference variable of type Container and assigns the object returned by getContentPane() to pane. Some methods available to the Container class are listed in Table 2.
| Container class methods |
public void add(Object obj)Method to add an object specified by obj to the pane. |
public void setLayout(Object obj)Method to set a layout specified by obj for a pane. |
Table 2: Some methods of the Container class.
We say it used to be this way because beginning at JDK 5.0, the calls to add() and setLayout() are equivalent to getContentPane().add() and getContentPane().setLayout() respectively. This means that in the next section Example 3 can also be written as shown in Example 3a. The remainder of the examples will not have the getContentPane() method, however the concept is still listed here in case you run into old code and you will have an understanding of what is going on.
It is still important to understand the content pane and that it allows objects to be placed in the window based on a layout. The default layout of the content pane is the BorderLayout. There are many layout managers. We will discuss the BorderLayout, GridLayout and FlowLayout layouts.
Layouts (an introduction)
With the window created and access to the content pane established, we can begin to think about how we want to lay out the window contents. This step is important as we need to know where out window components will be placed and whether their placement makes sense when used by an end-user or us. As a result, selecting a layout manager is somewhat crucial. But, there is nothing wrong with selecting a FlowLayout to just drop objects onto for testing purposes and then selecting perhaps a Border– or GridLayout once development is underway.
The GridLayout is the simplest layout to work with. This layout takes the content pane and divides up the pixel space into even chunks based on the number of rows and columns specified. If we select a GridLayout of 3×5, we would have three rows of 5 columns of equal size areas to place objects. It is essential to know the window’s dimensions when starting to imagine the layout. For example, a 400 pixel wide by 200 pixel high window loses a bit for the frame and title bar, and what is left is divided among the 15 grid locations.
Example 3 shows a 3×2 GridLayout using some labels. Again this version uses the getContentPane() method call.
import javax.swing.JFrame;
import javax.swing.JLabel;
import javax.swing.JTextField;
import java.awt.Container;
import java.awt.GridLayout;

public class Grid extends JFrame {
   private JLabel l1, l2, l3;
   private JTextField tf1, tf2, tf3;

   // Constructor for grid
   public Grid() {
      Container pane = getContentPane();

      pane.setLayout(new GridLayout(3,2));

      l1 = new JLabel("Label 1");
      l2 = new JLabel("Label 2");
      l3 = new JLabel("Label 3");
      tf1 = new JTextField("Text Field 1");
      tf2 = new JTextField("Text Field 2");
      tf3 = new JTextField("Text Field 3");

      pane.add(l1);
      pane.add(tf1);
      pane.add(l2);
      pane.add(tf2);
      pane.add(l3);
      pane.add(tf3);

      setTitle("GridLayout 3x2");
      setSize(300,200);
      setDefaultCloseOperation(EXIT_ON_CLOSE);
      setVisible(true);
   }

   public static void main(String[] args) {
      Grid win = new Grid();
   }
}
Example 3: Sample program to add labels to window using GridLayout.
The resulting window is shown in Figure 2.
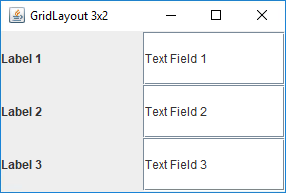
Figure 2: Window using grid layout created by program in Example 3.
Again, then next example is rewritten without the getContentPane() call and subsequent examples will not have it.
import javax.swing.JFrame;
import javax.swing.JLabel;
import javax.swing.JTextField;
import java.awt.GridLayout;

public class Grid extends JFrame {
   private JLabel l1, l2, l3;
   private JTextField tf1, tf2, tf3;

   // Constructor for grid
   public Grid() {
      setLayout(new GridLayout(3,2));

      l1 = new JLabel("Label 1");
      l2 = new JLabel("Label 2");
      l3 = new JLabel("Label 3");
      tf1 = new JTextField("Text Field 1");
      tf2 = new JTextField("Text Field 2");
      tf3 = new JTextField("Text Field 3");

      add(l1);
      add(tf1);
      add(l2);
      add(tf2);
      add(l3);
      add(tf3);

      setTitle("GridLayout 3x2");
      setSize(300,200);
      setDefaultCloseOperation(EXIT_ON_CLOSE);
      setVisible(true);
   }

   public static void main(String[] args) {
      Grid win = new Grid();
   }
}
Example 3a: getContentPane() removed.
Labels and Text Fields (JLabel, JTextField)
Fortunately, Example 3 has set the stage for the next part of our discussion, which involves using labels and text fields. As is shown in the code for Example 3, we have added three labels and three text fields to the content pane. The objects have been arranged from left to right and from top to bottom as each object was added to the content pane. This is the expected behavior when using the GridLayout.
Each JLabel and JTextField was explicitly declared with private instance variables of the class grid and then objects were instantiated and assigned to each variable. These particular statements in Example 3 have been highlighted. The remainder of the program is reminiscent of Example 2.
A String value was specified for each JLabel at the time of instantiation. The particular JTextField constructor used specified an initializer for the text field, but not a size.
Table 3 and Table 4 show some methods available when using JLabel and JTextField.
JLabel class methods |
public JLabel(String label)Constructor for JLabel that assigns left-aligned text specified in label. |
public JLabel(String label, int align)Constructor for JLabel that assigns text specified in label and whose alignment is specified in align. The values of align are SwingConstants.LEFT, SwingConstants.RIGHT or SwingConstants.CENTER. |
public JLabel(string label, Icon icon, int align)Constructor for JLabel that assigns text and an icon to the label. The icon appears to the left of the text.The text is aligned based on the value of align. |
public JLabel(Icon icon)Constructor for JLabel that creates a label with an icon. |
Table 3: Some methods of the JLabel class.
JTextField class methods. |
public JTextField(int columns)Constructor to set the text field size to columns. |
public JTextField(String s)Constructor to initialize the value of the text field to s. |
public JTextField(String s, int columns)Constructor to initialize the value of the text field to s and set the size to columns. |
public void setText(String s)Method to change the value of the text field to s. |
public String getText()Method to access the current value of the text field as a String. |
public void setEditable(boolean edit)Method to control the editable nature of the text field. If edit is false, the text field is protected. |
public void addActionListener(ActionListener obj)Method to register a listener object specified by obj to the text field. |
Table 4: Some methods of the JTextField class.
Buttons (JButton)
Buttons are a natural progression from labels and text fields. We are often required to fill out forms and submit the contents to some remote data receptacle. Buttons are usually available to perform the submission or perhaps clear a particular form. Example 4 demonstrates using two labels, two text fields, and two buttons with event handlers, one to move some data from one field to another and one to clear the fields. The use of JButton completes this form quite nicely.
The Reset button is intended to clear both text fields, and the Submit button will copy from the input text field to the display text field. The form created by the program in Example 4 is shown in Figure 3. Although this is a nice layout, there is only one crucial thing wrong – there is no action taken for a button press.
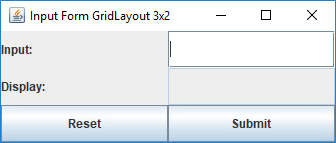
Figure 3: Form created by the program in Example 4.
import javax.swing.JFrame;
import javax.swing.JLabel;
import javax.swing.JTextField;
import javax.swing.JButton;
import java.awt.GridLayout;

public class Form extends JFrame {
   private JLabel inputL, displayL;
   private JTextField inputTF, displayTF;
   private JButton resetB, submitB;

   public Form() {
      setLayout(new GridLayout(3,2));

      inputL = new JLabel("Input:");
      displayL = new JLabel("Display:");
      inputTF = new JTextField("");
      displayTF = new JTextField("");
      resetB = new JButton("Reset");
      submitB = new JButton("Submit");

      add(inputL);
      add(inputTF);
      add(displayL);
      add(displayTF);
      displayTF.setEditable(false);
      add(resetB);
      add(submitB);

      setTitle("Input Form GridLayout 3x2");
      setSize(350,150);
      setDefaultCloseOperation(EXIT_ON_CLOSE);
      setVisible(true);
   }

   public static void main(String[] args) {
      Form win = new Form();
   }
}
Example 4: Sample program to create a form complete with buttons.
JButton class methods |
public JButton(Icon icon)Constructor to set the value of a button to some icon specififed by icon. |
public JButton(String s)Constructor to set the value of the button to the text in s. |
public JButon(String s, Icon icon)Constructor that assigns s and icon to a button. The icon appears to the left of the text. |
public void setText(String s)Method to assign text to a button specified by s. |
public String getText()Method to read the current text of a button and return it as a String. |
public void addActionListener(ActionListener obj)Method to register a listener object to the button specified by obj. |
Table 5: Some methods available to the JButton class.
Event Handling
For the Reset button to clear the two text fields and for the Submit button to copy the text from the input text field to the display text field, we need a mechanism to notify us that the button has been pressed.
Event handling allows us to assign unique listener methods to objects that can be used to cause work to be done when a user triggers an event. Now, these events can be anything from text fields being filled-in to a mouse passing over an object in a given window. We will get our two buttons to perform some essential work when pressed.
Let us start with creating a handler for an event. Clicking on a button creates and action event. This action event sends a message to an action listener. Our handler will be our action listener. These listeners will be in the form of additional classes that we will create. A class will be created to handle the Reset button and another class to handle the Submit button.
Consider the following code:
private class ResetButtonHandler implements ActionListener {
  public void actionPerformed(ActionEvent e) {
    inputTF.setText("");
    displayTF.setText("");
  }
}

private class SubmitButtonHandler implements ActionListener {
  public void actionPerformed(ActionEvent e) {
    displayTF.setText(inputTF.getText());
  }
}
The above bit of code creates two inner classes called ResetButtonHandler and SubmitButtonHandler. These are classes defined inside the class representing our window and hence, our program. They have access to all of the knowledge of the outer class, which is why they can access the text fields and the data they hold.
Again, at this point we know we have a couple of classes for button handlers namely ResetButtonHandler and SubmitButtonHandler. Each of these classes implements the ActionListener interface which provides an empty method actionPerformed(). This interface is an abstract class that only defines method headings or prototypes. As a result, you cannot instantiate an interface; rather we create classes that implement the interface. It is now our responsibility to provide the method body to the complete the picture for the compiler. The ActionListener interface is shown below:
public interface ActionListener {
   public void actionPerformed(ActionEvent e);
}
As you can see from the ActionListener interface definition, the actionPerformed() method has no body – it is open-ended. We need it to be open-ended since we will be providing the work to be done for each action event for which we intend to provide a handler.
To use the ActionListener interface we must import it from java.awt.event.ActionListener. Interfaces are basically contracts between the program and the compiler (actually, the runtime environment, but this metaphor still works). We agree that by implementing ActionListener we will provide a method called actionPerformed() as noted above.
Why? Because the runtime environment needs to know that when the time comes and an event needs to be handled, there will be a method called actionPerformed() ready to the receive the event and make sure an action is performed.
The ResetButtonHandler and SubmitButtonHandler classes are implementing the ActionListener interface and they each have an actionPerformed() method that defines the work to be done. Specifically the ResetButtonHandler will call the setText() method to clear the two text fields and the SubmitButtonHandler will call setText() of the display text field using the data retrieved from getText() of the input text field.
All that is left is to register the action listeners with their specific buttons. The following declarations create reference variables to hold the objects representing our handlers. They will allow us to call the addActionListener() method of each button.
private ResetButtonHandler rbHandler;
private SubmitButtonHandler sbHandler;
We can instantiate the handlers and add them as action listeners for each button.
rbHandler = new ResetButtonHandler();
resetB.addActionListener(rbHandler);

sbHandler = new SubmitButtonHandler();
submitB.addActionListener(sbHandler);
Setting up a GUI with many labels, fields, and buttons can be pretty tedious. The absolute tedium comes in creating action listeners for the events that will take place and making sure you have considered all the possibilities resulting from interacting with the user through events.
A final version of our program is presented in Example 5a. This example consolidates the code for the button handlers to make the code less cluttered and because we do not need to hold on to the references for the handlers.
import javax.swing.JFrame;
import javax.swing.JLabel;
import javax.swing.JTextField;
import javax.swing.JButton;
import java.awt.GridLayout;
import java.awt.event.ActionListener;
import java.awt.event.ActionEvent;

public class FormEvent extends JFrame {
   private JLabel inputL, displayL;
   private JTextField inputTF, displayTF;
   private JButton resetB, submitB;

   public FormEvent() {
      setLayout(new GridLayout(3,2));

      inputL = new JLabel("Input:");
      displayL = new JLabel("Display:");
      inputTF = new JTextField("");
      displayTF = new JTextField("");
      resetB = new JButton("Reset");
      submitB = new JButton("Submit");

      resetB.addActionListener(new ResetButtonHandler());
      submitB.addActionListener(new SubmitButtonHandler());

      add(inputL);
      add(inputTF);
      add(displayL);
      add(displayTF);
      displayTF.setEditable(false);

      add(resetB);
      add(submitB);
      setTitle("Input Form GridLayout 3x2");
      setSize(350,150);
      setDefaultCloseOperation(EXIT_ON_CLOSE);
      setVisible(true);
   }

   private class ResetButtonHandler implements ActionListener {
      public void actionPerformed(ActionEvent e) {
         inputTF.setText("");
         displayTF.setText("");
      }
   }

   private class SubmitButtonHandler implements ActionListener {
      public void actionPerformed(ActionEvent e) {
         displayTF.setText(inputTF.getText());
      }
   }

   public static void main(String[] args) {
      FormEvent win = new FormEvent();
   }
}
Example 5a: Final program for the event-driven form.
That said, we can still improve upon this and take out some complexity. This is done by eliminating the two inner classes and moving the interface to the main outer class. This allows us to also create a conditional for the actionPerformed() piece.
import javax.swing.JFrame;
import javax.swing.JLabel;
import javax.swing.JTextField;
import javax.swing.JButton;
import java.awt.GridLayout;
import java.awt.event.ActionListener;
import java.awt.event.ActionEvent;

// This class implements ActionListener instead of creating a
// separate class later.

public class FormEvent2 extends JFrame implements ActionListener {
  private JLabel inputL, displayL;
  private JTextField inputTF, displayTF;
  private JButton resetB, submitB;

  public FormEvent2() {
    setLayout(new GridLayout(3,2));

    inputL = new JLabel("Input:");
    displayL = new JLabel("Display:");
    inputTF = new JTextField("");
    displayTF = new JTextField("");
    resetB = new JButton("Reset");
    submitB = new JButton("Submit");

    // Instead of a separate handler, "this" object is
    // its own handler.
    resetB.addActionListener(this);
    submitB.addActionListener(this);

    add(inputL);
    add(inputTF);
    add(displayL);
    add(displayTF);
    displayTF.setEditable(false);

    add(resetB);
    add(submitB);

    // This sets the default button to action of Enter keypress.
    getRootPane().setDefaultButton(submitB);

    setTitle("Input Form GridLayout 3x2");
    setSize(350,150);
    setDefaultCloseOperation(EXIT_ON_CLOSE);
    setVisible(true);
  }

  // The actionPerformed() method is listed in this class instead
  // of creating a separate class as the handler.
  public void actionPerformed(ActionEvent e) {

    Object source = e.getSource();

    if ( source == resetB ) {
      inputTF.setText("");
      displayTF.setText("");
    }
    else if ( source == submitB ) {
      displayTF.setText(inputTF.getText());
    }

  }

  public static void main(String[] args) {
    FormEvent2 win = new FormEvent2();
  }

}
Example 5b: Final program for the event-driven form, reworked.
Note also that in the actionPerformed() method, we are getting the source of the event and comparing it to the objects that have a listener.
Finally, looking at line 44, there is a simple mechanism for associating the return key with a default button.
Additional Layouts
We have already seen the GridLayout, and as we mentioned earlier, there are some other layout managers available. This section will touch on the FlowLayout and BorderLayout as they are of some interest in designing a GUI. There are many other layout managers, and some are more difficult to use or require expert knowledge to set up effectively.
Recall that the default layout of the content pane is the BorderLayout. The BorderLayout maps the content pane into the four compass points north, south, east and west. In addition, there is a center. Example 6 shows a program with the BorderLayout and buttons in each section. The buttons do not function, but are simply used to fill out the region to accentuate the zones of the BorderLayout. Figure 4 shows the window that results from the program in Example 6.
import javax.swing.JFrame;
import javax.swing.JButton;
import java.awt.BorderLayout;

public class Border extends JFrame {
   private JButton nb, sb, eb, wb, cb;

   public Border() {
      setLayout(new BorderLayout());

      nb = new JButton("North Button");
      sb = new JButton("South Button");
      eb = new JButton("East Button");
      wb = new JButton("West Button");
      cb = new JButton("Center Buton");

      add(nb, BorderLayout.NORTH);
      add(sb, BorderLayout.SOUTH);
      add(eb, BorderLayout.EAST);
      add(wb, BorderLayout.WEST);
      add(cb, BorderLayout.CENTER);

      setTitle("BorderLayout");
      setSize(400,200);
      setDefaultCloseOperation(EXIT_ON_CLOSE);
      setVisible(true);
   }

   public static void main(String[] args) {
      Border win = new Border();
   }
}
Example 6: Sample program showing the use of the BorderLayout.
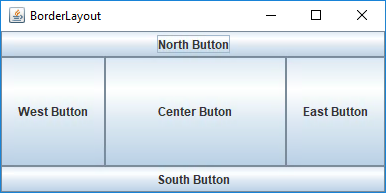
Figure 4: Buttons in the BorderLayout from Example 6.
As you can see from the picture in Figure 4, the objects placed in the BorderLayout occupy the complete section. Note that in the code for Example 6, the buttons are placed in their respective zones by use of named constants NORTH, SOUTH, EAST, WEST and CENTER defined in the BorderLayout class. If the window size is changed by using the mouse, the buttons will adjust to the changes and will likely cause the text in the button to shrink or otherwise disappear.
The FlowLayout allows you to place objects in the content pane without placement restrictions. The objects are placed in the content pane from left to right in the top line (or row), and when no more objects can fit, the objects will be placed on the following line. Interestingly, the FlowLayout is how the objects are repositioned as the window is adjusted.
import javax.swing.JFrame;
import javax.swing.JButton;
import javax.swing.JLabel;
import javax.swing.JTextField;
import java.awt.FlowLayout;
public class Flow extends JFrame {
private JButton b1, b2, b3;
private JLabel l1;
private JTextField tf1;
public Flow() {
setLayout(new FlowLayout());
b1 = new JButton("Button 1");
b2 = new JButton("Button 2");
b3 = new JButton("Button 3");
l1 = new JLabel("Label 1");
tf1 = new JTextField("Text Field 1 - 30 Columns", 30);
add(l1);
add(tf1);
add(b1);
add(b2);
add(b3);
setTitle("FlowLayout");
setSize(400,200);
setDefaultCloseOperation(EXIT_ON_CLOSE);
setVisible(true);
}
public static void main(String[] args) {
Flow win = new Flow();
}
}
Example 7: Sample program demonstrating the FlowLayout.
The program in Example 7 uses the FlowLayout to arrange a label, text field and three buttons. Figure 5 shows the initial window view of the window based on the size and the order of object placement.
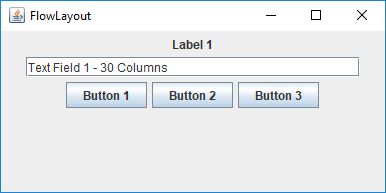
Figure 5: Initial object position in the FlowLayout based on the program from Example 7.
Using the mouse, re-size the window and see how the objects re-position themselves. A very narrow window will cause the objects to be stacked, and a vast window will make them appear on a single line as in Figure 6.
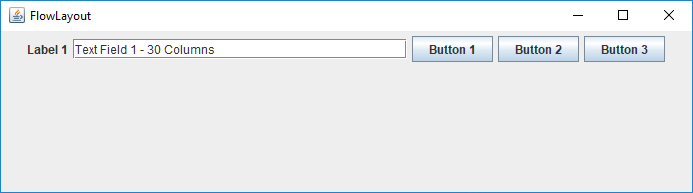
Figure 6: Stretched window of FlowLayout from Example 7.
Graphics
This section provides a rudimentary exposition of the AWT Graphics library. It is provided as part of a deeper understanding of graphical environments and ties into the CodeBreaker game provided in the interludes (q.v).
Up to this point, we have been talking about JFrame. While JFrame is powerful as a window builder, it lacks some of the details necessary to create freeform graphical content such as lines, squares, circles, and polygons. In order to do that we need to use a JPanel.
JPanel constructors and class methods |
public JPanel()Constructor to create a standard double-buffered JPanel with a FlowLayout. |
public JPanel(LayoutManager layout)Constructor to create a standard double-buffered JPanel with a specified layout. |
protected void paintComponent(Graphics g)Method that determines what will appear within the JPanel. [Inherited from javax.swing.JComponent class.] |
public void setBackground(Color bg)Method to assign a background color to the JPanel. Inherited from javax.swing.JComponent class.] |
Table 6: Some constructors and methods available to the JPanel class.
The JPanel is a lightweight container whereas the JFrame is more a heavyweight container. JPanel is capable of holding drawn objects including AWT graphics. JFrame can do the objects, but not the graphics. So, JFrame tyopically holds one or more JPanels.
Graphics is an abstract class defined in AWT. You cannot get direct access to it except by way of overriding the paintComponent() method. Our examples will do this by embedding the JPanel inside a JFrame using an inner class to maintain consistency throughout this chapter.
import java.awt.Color;
import java.awt.Graphics;
import javax.swing.JFrame;
import javax.swing.JPanel;

public class GraphicsEx1 extends JFrame {

  PaintCanvas p;

  public GraphicsEx1() {
    p = new PaintCanvas();
    add(p);

    setResizable(false);
    setSize(400, 400);
    setTitle("GraphicsEx1");
    setDefaultCloseOperation(JFrame.EXIT_ON_CLOSE);
    setVisible(true);

  }

  private class PaintCanvas extends JPanel {
    @Override
    public void paintComponent(Graphics g) {
      super.paintComponent(g);
      setBackground(Color.LIGHT_GRAY);

      g.setColor(Color.BLACK);
      g.drawLine(10,20,100,40);
      g.drawLine(390,20,290,40);

      g.setColor(Color.RED);
      g.drawRect(100, 100, 50, 50);
      g.drawOval(250, 100, 50, 50);

      g.setColor(Color.YELLOW);
      g.drawOval(100, 160, 50, 50);
      g.drawRoundRect(250, 160, 50, 50, 10, 10);

      g.setColor(Color.BLACK);
      g.fillRect(100, 220, 50, 50);
      g.fillOval(250, 220, 50, 50);

      g.setColor(Color.BLUE);
      g.fillOval(100, 280, 50, 50);
      g.fillRoundRect(250, 280, 50, 50, 10, 10);

     }
  }

  public static void main(String[] args) {
    // Start the show!
    GraphicsEx1 w = new GraphicsEx1();
  }

}
Example 8a: A program utilizing Graphics to draw basic shapes.
The code shown in Example 8a is designed to jump right in and start drawing. Remember coordinate geometry? The basic coordinate system is based on the origin (0,0) at the upper left-hand corner of the content pane. So, if you remember coordinate geometry, we are operating in Quadrant IV except all the x and y values are positive and move away from the origin.
The code in Example 8a produces the following graphic.
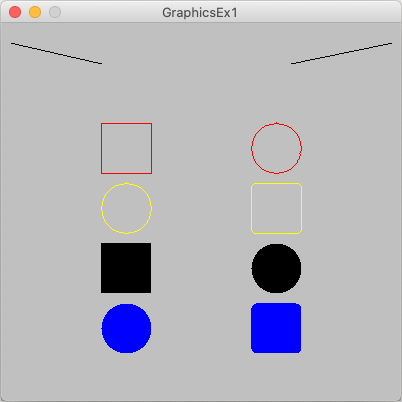
The next few tables describe some common Graphics methods and the color constants.
Drawing methods from the Graphics abstract class. |
|---|
abstract void drawLine(int x1, int y1, int x2, int y2)Draws a line in the current color from ( x1,y1) to (x2,y2). |
abstract void drawOval(int x, int y, int width, int height)Draws an oval in the current color of width and height using (x,y) as the top left origin. |
abstract void drawPolygon(int[] xPoints, int[] yPoints, int nPoints)Draws a closed polygon in the current color using the count of nPoints specified in the xPoints and yPoints arrays. |
void drawRect(int x, int y, int width, int height)Draws a hollow rectangle of width and height in the current color using (x,y) as the top left origin. |
abstract void drawRoundRect(int x, int y, int width, int height, int arcWidth, int arcHeight)Draws a hollow rectangle of width and height in the current color using (x,y) as the top left origin. The arcWidth and arcHeight values are used to determine the rouding of the corners. |
abstract void drawString(String str, int x, int y)Draws text in str using the current color and font weight starting at (x,y). |
Table 7: Some of the draw methods of the Graphics abstract class.
The following table defines some methods used for drawing filled graphic objects.
Fill methods from the Graphics abstract class. |
|---|
abstract void fillArc(int x, int y, int width, int height, int startAngle, int arcAngle)Fills an elliptical or circular arc using the current color and ( x,y) as the top left origin. |
abstract void fillOval(int x, int y, int width, int height)Fills an oval in the current color of width and height using (x,y) as the top left origin. |
abstract void fillPolygon(int[] xPoints, int[] yPoints, int nPoints)Fills a closed polygon in the current color using the count of nPoints specified in the xPoints and yPoints arrays. |
abstract void fillRect(int x, int y, int width, int height)Fills a rectangle of width and height in the current color using (x,y) as the top left origin. |
abstract void fillRoundRect(int x, int y, int width, int height, int arcWidth, int arcHeight)Fills a rectangle of width and height in the current color using (x,y) as the top left origin. The arcWidth and arcHeight values are used to determine the rouding of the corners. |
Table 8: Some of the fill methods of the Graphics abstract class.
Color is a class defined in java.awt.Color. Some of the common colors are noted below.
Constructor and a few constants from Color. |
|---|
Color(int r, int g, int b)Constructor for a custom color specifying the levels of Red, Gree and Blue. |
Color.BLACK and Color.black |
Color.RED and Color.red |
Color.LIGHT_GRAY and Color.lightGray |
Color.YELLOW and Color.yellow |
Table 9: Some of the constants defined by the Color class.
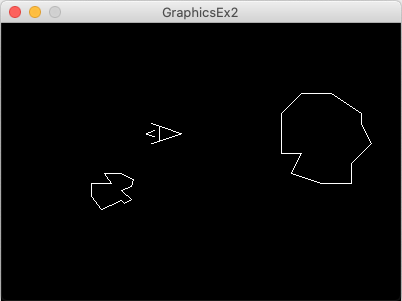
We used a drawing and a grid system to render some art for the following example. You can click on the image below to see the full-size picture.
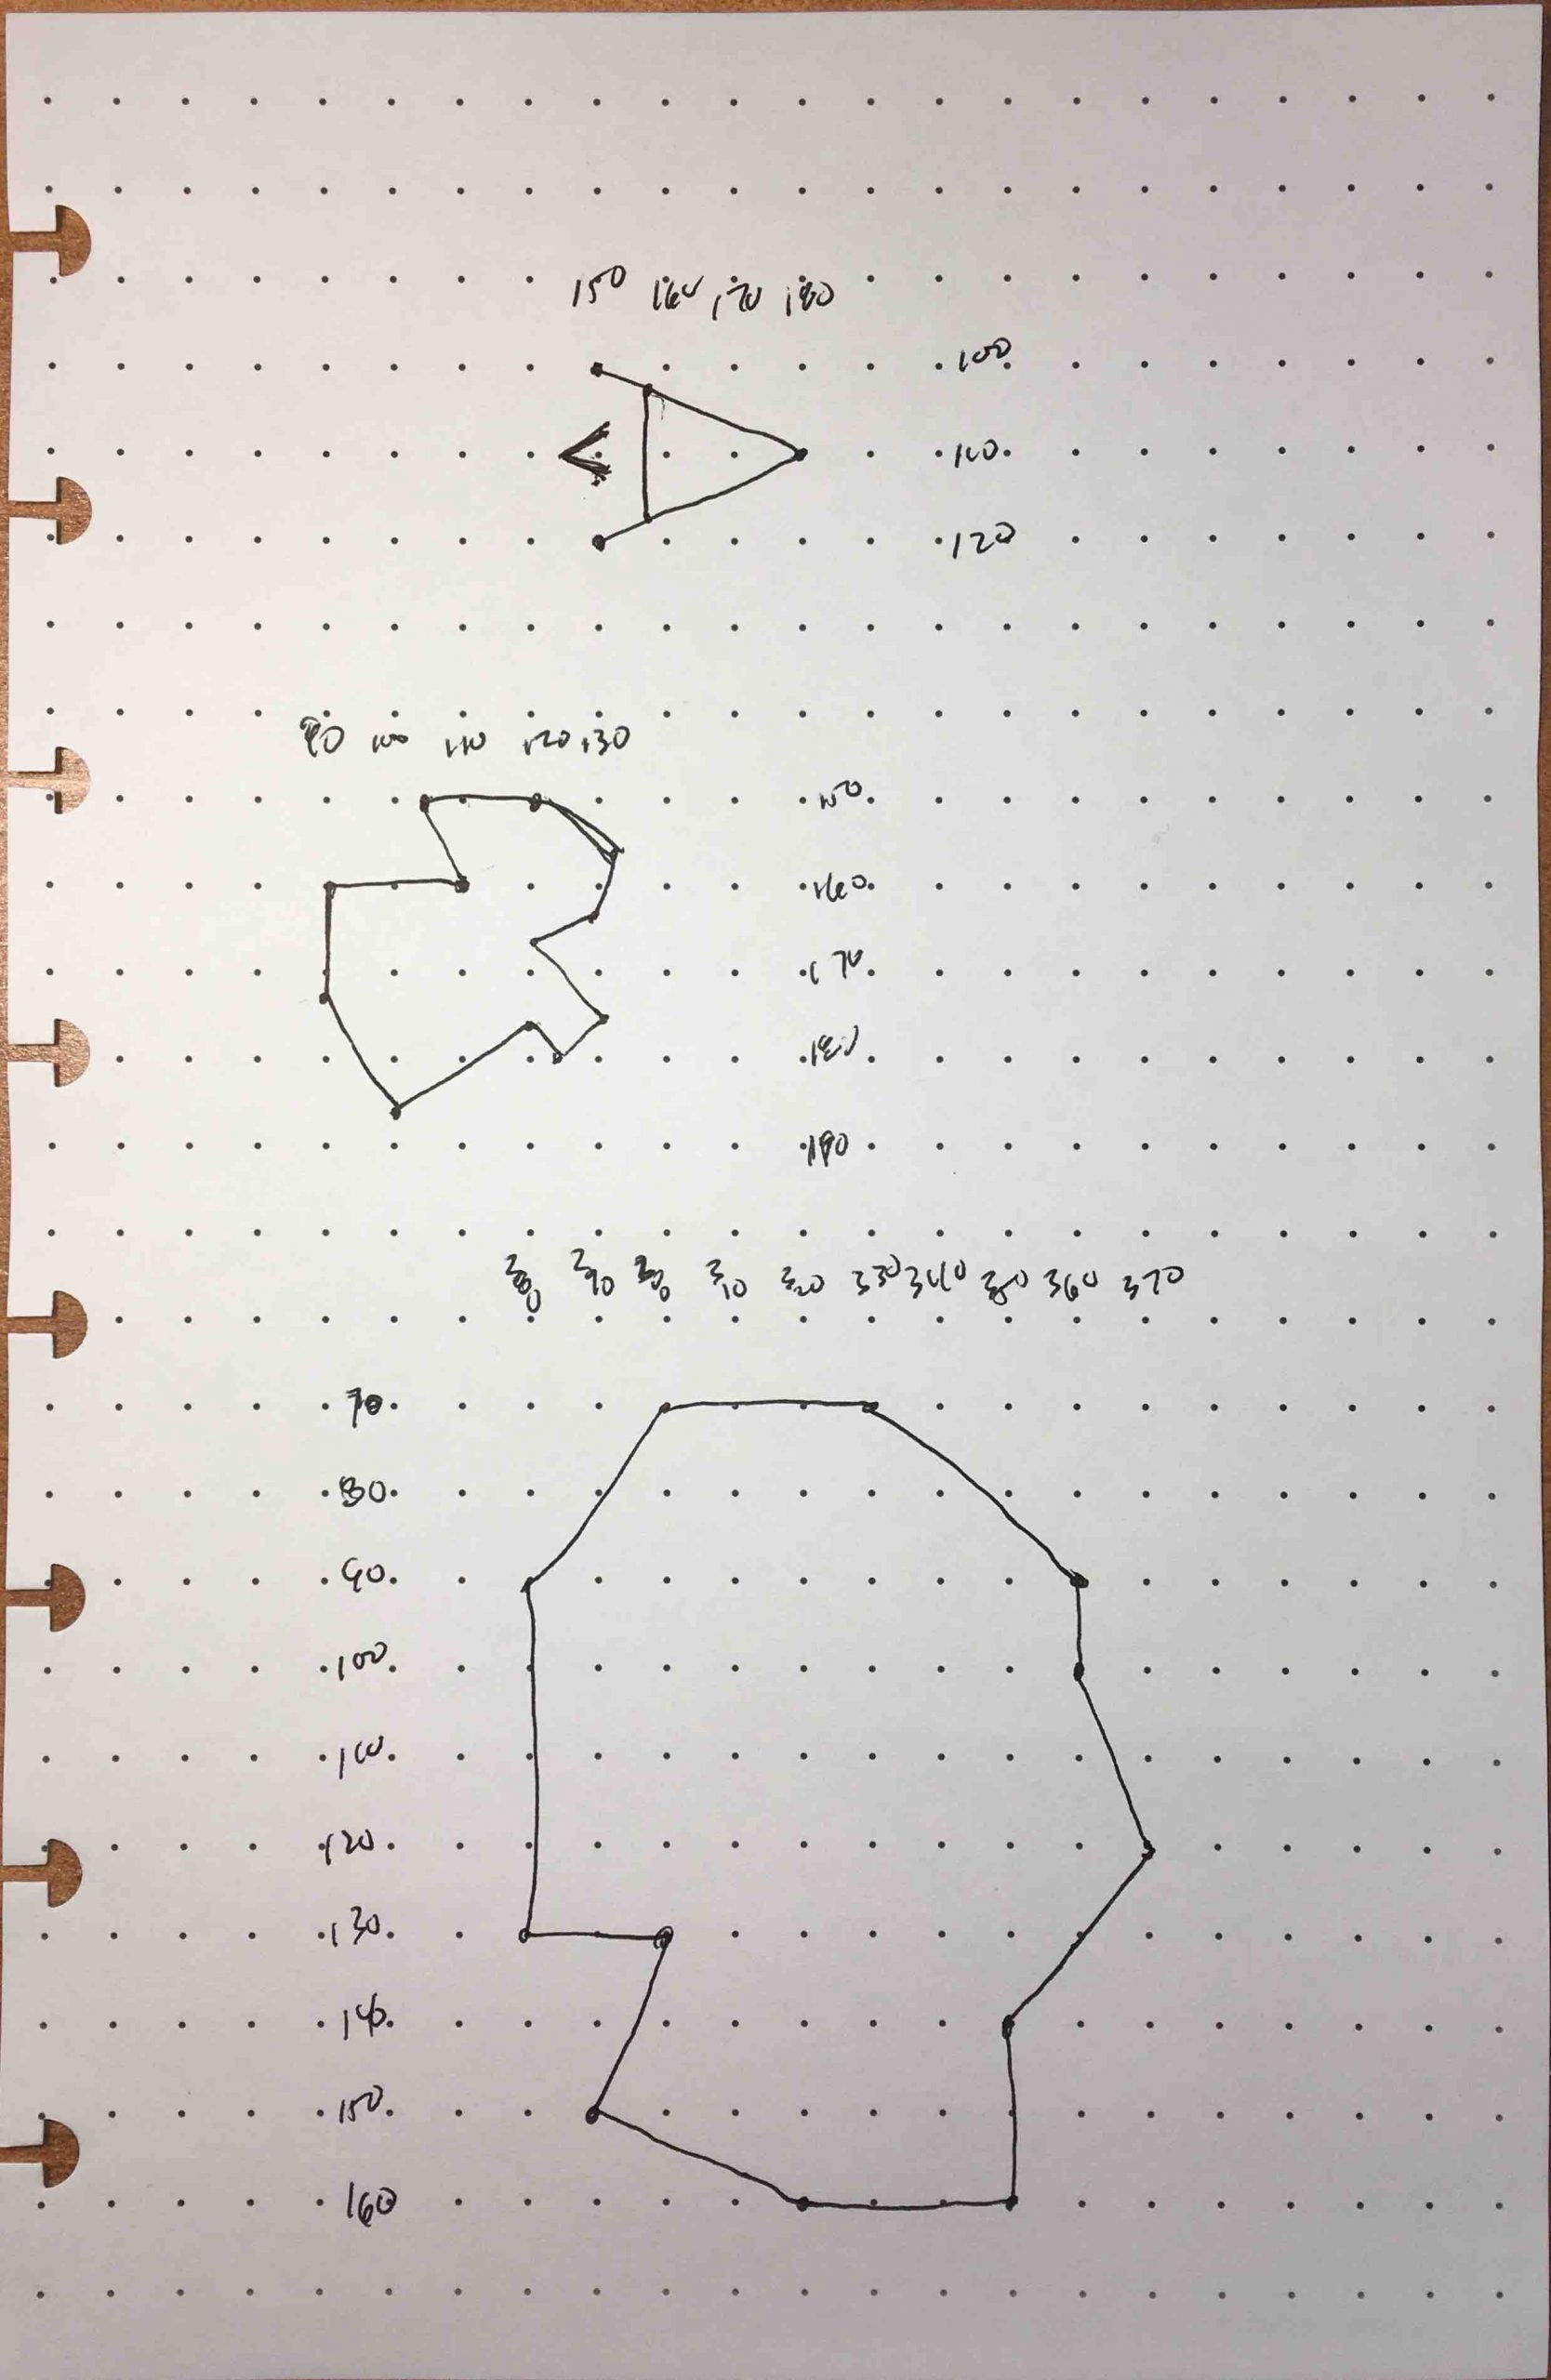
The drawing is a few freehand shapes from an old game called Asteroids. You would fly around in space to blow up the asteroids before they crushed your ship. As an homage to a once great game, we now have a piece of Java code that captures these images. Using the coordinate system on the drawing, the drawLine() method was used to create the ship while the drawPolygon() method was used to create the two asteroids.
import java.awt.Color;
import java.awt.Graphics;
import javax.swing.JFrame;
import javax.swing.JPanel;

public class GraphicsEx2 extends JFrame {

  //PaintCanvas p;

  public GraphicsEx2() {
    //p = new PaintCanvas();
    add(new PaintCanvas());

    setResizable(false);
    setSize(400, 300);
    setTitle("GraphicsEx2");
    setDefaultCloseOperation(JFrame.EXIT_ON_CLOSE);
    setVisible(true);

  }

  private class PaintCanvas extends JPanel {
    @Override
    public void paintComponent(Graphics g) {
      super.paintComponent(g);
      setBackground(Color.BLACK);

      g.setColor(Color.WHITE);

      // main ship body
      g.drawLine(150,100,180,110);
      g.drawLine(150,120,180,111);
      g.drawLine(158,103,158,117);

      // jet boost
      g.drawLine(153,107,145,110);
      g.drawLine(153,113,145,111);

      // asteroid 1
      int[] poly1x = {280, 280, 300, 290, 320, 350, 350, 370, 360, 360, 330, 300};
      int[] poly1y = {90, 130, 130, 150, 160, 160, 140, 120, 100, 90, 70, 70};
      g.drawPolygon(poly1x, poly1y, poly1x.length);

      // asteroid 2
      int[] poly2x = {90, 90, 100, 120, 123, 130, 120, 130, 132, 120, 103, 110};
      int[] poly2y = {160, 173, 186, 177, 180, 176, 167, 163, 156, 150, 150, 160};
      g.drawPolygon(poly2x, poly2y, poly2x.length);
     }
  }

  public static void main(String[] args) {
    // Start the show!
    GraphicsEx2 w = new GraphicsEx2();
  }

}
Example 8b: A program utilizing Graphics to draw a familiar video game.
The code in Example 8b creates the picture shown below.
EVERYTHING BELOW THIS HAS BEEN MERGED FROM A DIFFERENT CHAPTER AND NEEDS A REORG!
(WJ – 20220103)
[NOTE: INCOMPLETE]
Review
Recall from the GUI introduction that we build our programs by extending the JFrame class.
Everything in the javax.swing package is derived from the Advanced Windows Toolkit (AWT) which is defined in a variety of classed in java.awt. As such Component defines all methods for graphical components that users may interact with and Container defines methods for the generic container component that can contain other AWT components. That is, the Container itself is also a component.
That said, we now know that all of the JThingies in Swing are derived from the Container class and subsequently the Component class since Component is the superclass of Container.
JPanel
JPanel is a very useful lightweight container. When added to a JFrame, this container along with an appropriately chosen layout manager can offer simple, contained management of objects without having to hunt through a JFrame.
In addition, the JFrame has the JMenuBar as part of it’s contentPane so having your application extend JPanel it not a solid option if you want a menu bar. Sure, you could add a BorderLayout to the JPanel and then add a JMenuBar in the NORTH, but then that likely defeats the purpose of having selected the JPanel in the first place.
The validate(), invalidate() and revalidate() methods
The validate() method is inherited from the Component class which is at the top of the AWT hierarchy from which Swing is derived. This validates all layout-related changes that are currently invalid.
The invalidate() method is also inherited from the Component class. It invalidates all the components within the container on which this method was invoked including the container.
The revalidate() method helps in updating a layout during runtime when it otherwise may not happen. In general, the runtime environment can handle updating the current view. This most often occurs when a window is resized, made visible, brought out of minimizing, and changed the font, to name a few.
The revalidate() method was defined in JComponent prior to Java 7. After Java 7, revalidate() was added to Component and is inherited and is overridden by subclasses.
There is a case where you may need to call revalidate() directly. This is true if you add or remove components during runtime and the change does not trigger one of the situations mentioned above where the revalidation would occur naturally.
JCheckbox, JRadioButton, JToggleButton
Like buttons, we often require actions when something is selected or pressed. These actions don’t always have to happen right away. Sometimes we need to make sure that something is recorded.
The JButton class requires us to act immediately when the event occurs. The classes JCheckBox, JRadioButton and JToggleButton allow us to record state, but give us the option to act immediately or sometime in the future.
Some useful methods of these classes, inherited from AbstractButton are shown in the following table:
Some useful method from AbstractButton |
public boolean isSelected()Returns the state of the button. True if the toggle button is selected, false if it’s not. |
public void setSelected(boolean b)Sets the state of the button. Note that this method does not trigger an actionEvent. Call doClick to perform a programatic action change. |
public void doClick()Programmatically perform a “click”. This does the same thing as if the user had pressed and released the button. |
Table 1: Button methods inherited from AbstractButton.
import javax.swing.*;
import java.awt.*;
import java.awt.event.*;

public class Buttons extends JFrame implements ActionListener {

  JButton b = new JButton("Button");
  JRadioButton rb = new JRadioButton("RadioButton");
  JToggleButton tb = new JToggleButton("ToggleButton");
  JCheckBox cb = new JCheckBox("Checkbox");

  public Buttons() {

    setLayout(new GridLayout(4,1));
    setTitle("Buttons");
    setDefaultCloseOperation(EXIT_ON_CLOSE);
    setSize(150,200);

    b.addActionListener(this);
    add(b);
    rb.addActionListener(this);
    add(rb);
    tb.addActionListener(this);
    add(tb);
    cb.addActionListener(this);
    add(cb);

    setVisible(true);

  }

  public void actionPerformed(ActionEvent e) {

    Object s = e.getSource();
    if (s == b)
      JOptionPane.showMessageDialog(null,"Button was pressed", "Pressed",
                                    JOptionPane.INFORMATION_MESSAGE);
    else if (s == rb)
      JOptionPane.showMessageDialog(null,"Radio button isSelected() state is " +
                                    rb.isSelected(), "Pressed",
                                    JOptionPane.INFORMATION_MESSAGE);
    else if (s == tb)
      JOptionPane.showMessageDialog(null,"Toggle button isSelected() state is " +
                                    tb.isSelected(), "Pressed",
                                    JOptionPane.INFORMATION_MESSAGE);
    else if (s == cb)
      JOptionPane.showMessageDialog(null,"Check box isSelected() state is " +
                                    cb.isSelected(), "Pressed",
                                    JOptionPane.INFORMATION_MESSAGE);
  }

  public static void main(String[] args) {
    Buttons b = new Buttons();
  }
}
Example 1: Set reactions to every form of button.
The following example is a variation on the above where we display the state of everything only when the Show state button is pressed.
import javax.swing.*;
import java.awt.*;
import java.awt.event.*;

public class ButtonStates extends JFrame implements ActionListener {

  JButton b = new JButton("Show states");
  JRadioButton rb = new JRadioButton("RadioButton");
  JToggleButton tb = new JToggleButton("ToggleButton");
  JCheckBox cb = new JCheckBox("Checkbox");

  public ButtonStates() {

    setLayout(new GridLayout(4,1));
    setTitle("ButtonStates");
    setDefaultCloseOperation(EXIT_ON_CLOSE);
    setSize(150,200);

    b.addActionListener(this);
    add(b);
    add(rb);
    add(tb);
    add(cb);

    setVisible(true);

  }

  public void actionPerformed(ActionEvent e) {

    JOptionPane.showMessageDialog(null,"Button was pressed\n" +
                                  "\nRadio button isSelected() state is " + rb.isSelected() +
                                  "\nToggle button isSelected() state is " + tb.isSelected() +
                                  "\nCheck box isSelected() state is " + cb.isSelected(),
                                  "Pressed", JOptionPane.INFORMATION_MESSAGE);

  }

  public static void main(String[] args) {
    ButtonStates b = new ButtonStates();
  }
}
Example 2: Preserve states and check later.
JButton(Reloaded)
Setting up a particular arrangement of objects on the screen can be challenging. Equally challenging is getting specific details of a button just right. Consider the following piece of code.
import javax.swing.*;
import java.awt.*;
import java.awt.event.*;

public class TelephoneMini extends JFrame implements ActionListener {

  String[] kdig = {"1", "2", "3", "4", "5", "6", "7", "8", "9", "*", "0", "#"};
  String[] kval = {"", "ABC", "DEF", "GHI", "JKL", "MNO", "PQRS", "TUV", "WXYZ", "", "OPER", ""};
  JButton[] keys = new JButton[12];
  JPanel keypad = new JPanel(new GridLayout(4,3));
  JPanel name = new JPanel(new FlowLayout());
  JPanel copy = new JPanel(new FlowLayout());

  public TelephoneMini() {
    int x;

    setTitle("Telephone");
    setResizable(false);
    setSize(300,300);
    setDefaultCloseOperation(EXIT_ON_CLOSE);

    setLayout(new BorderLayout());
    add(BorderLayout.NORTH, name);
    name.add(new JLabel("New York Telephone"));

    for (x = 0; x < 12; x++) {
      keys[x] = new JButton();
      setButtonFace(keys[x], kdig[x], kval[x]);
      keypad.add(keys[x]);
    }

    keys[10].addActionListener(this);

    add(BorderLayout.CENTER, keypad);

    add(BorderLayout.SOUTH, copy);
    copy.add(new JLabel("Copyright (c) 2018"));
    setVisible(true);
  }

  private void setButtonFace(JButton b, String  l1, String l2) {
    b.setLayout(new BorderLayout());
    b.add(BorderLayout.CENTER, new JLabel(l1, SwingConstants.CENTER));
    b.add(BorderLayout.SOUTH, new JLabel(l2, SwingConstants.CENTER));
  }

  public void actionPerformed(ActionEvent e) {

  }

  public static void main(String[] args) {

    TelephoneMini t = new TelephoneMini();

  }
}
The idea here is multi-fold. First, we use a BorderLayout for the JFrame and set the panels name and copy to the NORTH and SOUTH respectively. The panels have FlowLayout assigned so that the JLabel is centered, but this design is more about the possibility of adding more detail to the NORTH and SOUTH. Having a panel with a layout manager can really help.
Then in the CENTER of the JFrame, we added a JPanel with a GridLayout. This grid then allows us to add the telephone buttons. We run into the problem that breaking the text with newlines or HTML code still doesn't get the look and feel we get with another layout manager applied to each button.
Additionally, we've created a method setButtonFace() that allows us to customize each button from the two arrays of String which contain the text that we wish to appear on each button. Applying a BorderLayout to each button allows us to place the number or character in the CENTER while letters for each key appear in the SOUTH.
JComboBox
JList
Menus
More with layouts
Although you can use BorderLayout, GridLayout and FlowLayout at will, you may also consider mixing layouts or even nesting them to create the effect you need.
You can also try using a null layout for absolute positioning. Absolute positioning is achieved by specifying the coordinates of where you want the objects to appear within the container.
public void setBounds(int x, int y, int width, int height)
Moves and resizes this component. The new location of the top-left corner is specified by x and y, and the new size is specified by width and height.
Consider the following program that sets up a login window complete with a help menu.
import javax.swing.*;
import java.awt.*;
import java.awt.event.*;

public class Login extends JFrame implements ActionListener {

  JLabel ul = new JLabel("Username:");
  JLabel pl = new JLabel("Password:");
  JTextField uname = new JTextField();
  JPasswordField upass = new JPasswordField();

  JButton cancel = new JButton("Cancel");
  JButton login = new JButton("Login");

  JMenuBar mb = new JMenuBar();
  JMenu m = new JMenu("Options");
  JMenuItem help = new JMenuItem("Help");

  public Login() {
    setLayout(null);
    setResizable(false);
    setSize(400, 250);
    setTitle("Login");
    setDefaultCloseOperation(EXIT_ON_CLOSE);

    mb.add(m);
    help.addActionListener(this);
    m.add(help);
    setJMenuBar(mb);

    ul.setBounds(100,50,100, 25);
    pl.setBounds(100,100,100, 25);
    uname.setBounds(200,50,100, 25);
    upass.setBounds(200,100,100, 25);
    cancel.setBounds(100,150,100, 25);
    login.setBounds(200,150,100, 25);

    add(ul);
    add(pl);
    add(uname);
    add(upass);
    cancel.addActionListener(this);
    add(cancel);
    login.addActionListener(this);
    add(login);

    setVisible(true);
  }

  public void actionPerformed(ActionEvent e) {

    Object s = e.getSource();

    if (s == cancel)
      System.exit(1);
    else if (s == login) {
      JOptionPane.showMessageDialog(null,"Login performed!",
                                    "Login", JOptionPane.INFORMATION_MESSAGE);
      System.exit(0);
    }
    else if (s == help)
      JOptionPane.showMessageDialog(null,"Help goes here!",
                                    "Help", JOptionPane.INFORMATION_MESSAGE);
  }

  public static void main(String[] args) {
    Login l = new Login();
  }
}
Example X: Program to display login window with no layout manager.
Granted, this is bare-bones, but it gets the point across. You can layout the window however you like, but you may have some serious planning to make it pretty.
JTextArea
Keyboard Events
Mouse Events