(Updated January 12, 2025)
Table of contents
-
Objects
Packages of Predefined Classes and Methods
Random Numbers –
Math.Random()(OPTIONAL) Random Numbers –
Random Class(OPTIONAL) Random Numbers –
ThreadLocalRandom ClassString – RevisitedVIDEO – Strings
Output with the
printf() methodWrapper Classes
GUI-based I/O
VIDEO – Basic GUI with
JOptionPaneConverting
println to printfQuiz
Exercises
Objects
In the previous chapter, we introduced many things: identifiers, operators, expressions, precedence, and data types. The majority of the time spent was on primitive data types like int, double, char, boolean. We also introduced String, which is not primitive but a class.
Classes are used to describe objects. They define two basic properties:
- What they know.
- What they can do.
We saw that String variables can have someone’s name assigned to them (what they know), and we could get the length of the contents by invoking a method that counts the characters in the String object (what they can do).
We now begin to continue our journey into Object-Oriented Programming (OOP) by describing what objects are and some terminology surrounding their use. Consider the following:
String s;

s = "My string value.";
The variable s is known as a reference variable. The type String is a class, not a primitive type like int. The reference variable s contains what we will loosely call an address that references the string of characters "My string value." That address is the location of String object. That object is also known as an instance of the String class.
To be more accurate, the above assignment statement is shorthand for the following:
s = new String("My string value.");
In the previous chapter, we saw something similar when introducing the Scanner class. The new reserved word indicates we want to instantiate (create) a String object. This also causes the String() constructor to be invoked. The constructor is responsible for the object’s setup, including setting a specified value. Finally, the address or location of the instance is stored in the variable called s.
To compare primitive data versus objects, see the figure below:
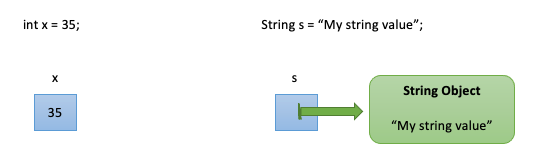
Figure 1: Storing primitive data compared to storing references.
Consider, again, the following statement:
Scanner kb = new Scanner(System.in);
If we were to read this statement aloud, we would say:
kb is a variable of type Scanner which gets the value of a new Scanner object wrapped around System.in. Similarly, we could say kb is a variable of type Scanner which gets the value of a new Scanner object wrapped around the keyboard.
System.in is pre-defined when your program starts. It is a reference variable that points to an InputStream object. Below is a visual of how kb references the Scanner object that uses the same InputStream object stored in System.in.
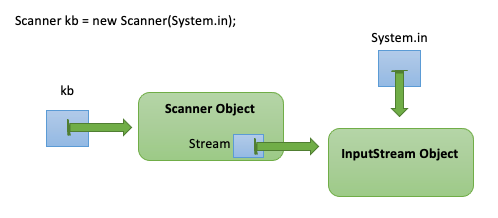
Figure 2: Relationship of objects using Scanner to read input from the user.
Since System.in usually represents the keyboard, it is ordinarily just a stream of characters. We can turn a stream of characters into numbers, words, and lines by wrapping that object with a Scanner object.
Similarly, the System.out is predefined and references a PrintStream object. The PrintStream class defines the print(), println() and printf() methods. It also defines many others, but these are the ones we use most.
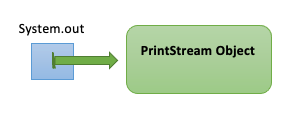
Figure 3: The System.out reference to PrintStream.
Packages of Predefined Classes and Methods.
The String class is defined in the package java.lang, which you recall is the package that is automatically imported for our Java programs at runtime.
Java is loaded with predefined classes like the String class. The System class is also predefined. Both String and System come from the predefined package known as java.lang. Packages provide libraries of predefined classes.
These classes also possess predefined methods. You can use any of these classes and their associated methods in your programs as long as you know what package and class to import and the syntax of the methods for a particular class. The following diagram shows a simplified view of package, class, and method relationships. All of these are introduced in this and the previous chapter.
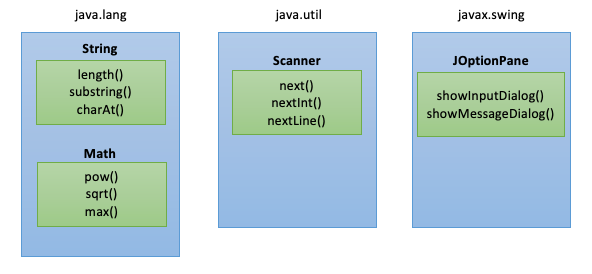
Figure 4: Packages, classes, and methods.
It is also helpful to know if the methods are static or non-static methods. Simply put, static methods do not require an object for you to use them. You can simply call the method on the class.
In other words, a static method can be called on a class; a non-static method must be called on an instance of a class (object).
Methods often require additional information. This additional information is called the method’s arguments or parameters. These are passed to a method by simply placing the required values into the method’s parentheses. We have already seen quite a bit of this with our output statements. Note, too, that the use of the Scanner class has shown us methods that require no arguments, like nextInt(). Even though the method required no input, we must still provide the parentheses. This is essential to indicate to the compiler that we are invoking a method and not trying to access some unrelated identifier called nextInt.
The String class consists of primarily non-static methods. Conversely, the Math class is one whose methods are all static. This means we can use all these methods simply using the method’s class name.
The program in Example 1 demonstrates the use of some static methods from the Math class.
import java.util.Scanner;

public class Methods {

    static Scanner kb = new Scanner(System.in);

    public static void main(String[] args) {
        double x, y, square;

        System.out.println("\nThis program uses pow to demonstrate");
        System.out.println("static methods. It will also find");
        System.out.println("the min and max of the two values");
        System.out.println("you have entered.\n");

        // alternate prompting and reading values
        System.out.print("Enter a value for x: ");
        x = kb.nextDouble();

        System.out.print("Enter a value for y: ");
        y = kb.nextDouble();

        // print findings using some Math class methods.
        System.out.println("The value of x raised to the y is " + Math.pow(x,y));
        System.out.println("The min value is " + Math.min(x,y));
        System.out.println("The max value is " + Math.max(x,y));
    }
}
Example 1: Using static methods from the Math class.
A sample run is shown below with user-provided values in bold.
This program uses pow to demonstrate
static methods. It will also find
the min and max of the two values
you have entered.
Enter a value for x: 3.4
Enter a value for y: 2.7
The value of x raised to the y is 27.226579002152647
The min value is 2.7
The max value is 3.4
The Math class contains dozens of methods. Some Math methods are shown in Table 1.
| Method | Purpose |
|---|---|
static double sqrt(double a) |
Returns the square root of the value in a. |
static double cbrt(double a) |
Returns the cube root of the value in a. |
static double pow(double x, double y) |
Returns x raised to the y power. |
static double exp(double a) |
Return Euler’s number e raised to the a power. |
static double random() |
Returns a positive double value from 0.0 to less than 1.0. |
Table 1: Some static methods available to the Math class.
Now that we have introduced one specific method, Math.random(), the following three sections are dedicated to the concept of generating random numbers for a variety of purposes.
You may proceed with the next section and consider the additional sections optional.
Random Numbers – Math.Random()
When creating games or simulations, there is a strong need for fixed details to help the process to whatever discovery is needed. In addition, we often have to ask a lot of what-if type questions. In other words, rather than using fixed, known quantities, allow the system to operate with a little more entropy or randomness.
From a gaming perspective, the idea of randomness is essential. Imagine a world where random monster encounters are likely to occur. Or perhaps there is only a certain percentage chance that opponents can see each other or a possibility that a magical spell could fail if a monster makes a saving throw.
As a result, we could identify many rules of how encounters can happen but leave it to a dice roll to determine if it will happen. We will begin with a simple 6-sided die roll.
d6 = (int)(Math.random() * 6 + 1);
To understand the above statement, we have to recall the details of the Math.random() method from Table 1. This method returns a value greater than or equal to 0.0 and less than 1.0, but never 1.0. This means that the number can be viewed as representing a portion of something but never the whole something. When viewed this way and we multiply by 6, we are taking a percentage of 6. Recall that Math.random() returns a double, and multiplying by an int does not change the result; it will still be a double.
But, we need an int because die rolls are whole number quantities, so we cast the result to an int. Remember that the cast to (int) on the left happens after the expression on the right. Also, recall that casting to int simply removes the fractional portion, leaving just the whole number quantity.
So, why do we add one? We are adding one simply because we must do it to have the proper range of values. If Math.random() can never return 1.0, we can never achieve a value of 6. The range of whole numbers without adding one is 0-5. When we add one, we add one to both sides of the range, yielding 1-6. Now that is a proper 6-sided die roll.
To develop the details further, consider the following piece of code:
public class Randomness {

    public static void main(String[] args) {
        double r;

        // get number in the range 0 to <1.0.
        r = Math.random();

        System.out.println("r is " + r + "\n");
        System.out.println(r * 4 + 1);   // 0 -> ~3.9 plus 1
        System.out.println(r * 6 + 1);   // 0 -> ~5.9 plus 1
        System.out.println(r * 8 + 1);   //
        System.out.println(r * 10 + 1);  // ...
        System.out.println(r * 12 + 1);  //
        System.out.println(r * 20 + 1);  // 0 -> ~19.9 plus 1
    }
}
Example 2a: Using Math.random().
This code simulates different dice rolls (d4, d6, d8, d10, d12, and d20) using the same single random value. Some sample output is shown below:
r is 0.10302278380834196

1.4120911352333678
1.6181367028500517
1.8241822704667356
2.0302278380834196
2.2362734057001035
3.060455676166839
r is 0.5935889706585027

3.3743558826340108
4.561533823951017
5.7487117652680215
6.9358897065850265
8.123067647902033
12.871779413170053
In the output produced, the fractional portion was included to show what the value would look like if we did not cast the result. The result would be the whole number quantity upon applying the cast.
Now, let us say that you want to get a random number in a range that is not 0 to something or 1 to something. How about a number in the range of 45 to 92? This can be easily achieved.
Remember that we already know how to get specific ranges. If we want 0-5, we multiply by 6 (see above). If we want 0-9, we multiply by 10. So the generic rule is if we multiply by n, we get the range 0 to n-1. But in the die roll example, we added 1. Yes. Yes, we did. And the secret lies therein – we can add another value to alter the range.
So, 45 to 92 inclusive? No problem. Take a look at the math below.
   45   92
  -45  -45
  ---  ---
    0   47
Since we know how to do ranges that start with 0, we will take the lower bound value and subtract it from both ends of the range. Remember that by adding 1 to the calculation, as we did earlier, we added 1 to both ends. Just make sure that whatever you do, it happens on both ends.
By subtracting 45 from both sides, we get the range 0 to 47. If this represents 0 to n-1, then n is 48. Now we consider:
x = (int)(Math.random() * 48);
However, we must add back what we took away to get us to that zero-based range.
x = (int)(Math.random() * 48 + 45);
Math.random() is not the only method for producing random numbers. Next, we look at the Random class.
(OPTIONAL) Random Numbers – Random Class
The Random class offers several methods to get the job done. However, this class and its methods are not synchronized and, as such, are not thread-safe, which could be a consideration in more advanced projects. The Math.random() method is synchronized and is safer to use where synchronization is required. For our purposes, Random is just fine!
Table 2 shows some of the components of the Random class.
| Method | Purpose |
|---|---|
Random() |
Constructor to create a new random number generator. |
Random(long seed) |
Constructor to create a new random number generator with the given seed. |
double nextDouble() |
Returns the next pseudorandom double value from 0.0 to less than 1.0. |
int nextInt() |
Return the next pseudorandom int. |
int nextInt(int bound) |
Return the next pseudorandom int from 0 to less than bound. |
Table 2: Some constructors and methods of the Random class.
Now, we look at how to use Random. First, we need to create the pseudo-random number generator object; then, we can produce some random numbers. To use the Random class, we must also import java.util.Random.
import java.util.Random;

public class TestRandom {

    public static void main(String[] args) {
        int d6, x;
        Random rnd = new Random();  // create new Random object

        // like Scanner we can use nextDouble() and nextInt()
        System.out.println("rnd.nextDouble() is " + rnd.nextDouble());

        // six-sided die roll.
        d6 = rnd.nextInt(6) + 1;
        System.out.println("d6 is " + d6);

        // uses nextInt(48) to replace (int)(Math.random() * 48)
        x = rnd.nextInt(48) + 45;
        System.out.println("x is " + x);
    }
}
Example 2b: Performing similar tasks with the Random class.
The code in Example 2b will produce different output each time you run it. The result is similar to that shown below.
rnd.nextDouble() is 0.41839914206029805
d6 is 5
x is 72
If you change the line to read
Random rnd = new Random(42);
It will seed the random number generator the same way every time, consistently producing the same random numbers. The output below demonstrates this. Try it and see for yourself.
rnd.nextDouble() is 0.7275636800328681
d6 is 1
x is 65
We are using the same seed, which results in the same set of random numbers based on the mathematical method produced by the method. This is also why we call them pseudo-random.
(OPTIONAL) Random Numbers – ThreadLocalRandom Class
Beginning in Java 7, a new random number generator was introduced. It is thread-safe and very fast. The class is called ThreadLocalRandom, and you need to import java.util.concurrent.ThreadLocalRandom to use it.
| Method | Purpose |
|---|---|
static ThreadLocalRandom current() |
Returns the ThreadLocalRandom object for the current thread. |
double nextDouble() |
Returns a pseudorandom double value from 0.0 to less than 1.0. |
double nextDouble(double bound) |
Returns a pseudorandom double value from 0.0 to less than bound. |
double nextDouble(double origin, double bound) |
Returns a pseudorandom double value from origin to less than bound. |
int nextInt() |
Returns a pseudorandom int. |
int nextInt(int bound) |
Returns a pseudorandom int from 0 to less than bound. |
int nextInt(int origin, int bound) |
Returns a pseudorandom int from origin to less than bound. |
Table 3: Some methods of the ThreadLocalRandom class.
Note that methods of ThreadLocalRandom are similar to those of Random. This is primarily because ThreadLocalRandom is a subclass of Random, meaning it is derived directly from Random. A few new methods were also introduced to include a nextInt() method with lower and upper bounds, allowing us to simplify range-based random number generation.
You cannot create a new ThreadLocalRandom object, which means you also cannot seed it as we could with Random. There is an object associated with each thread of your program. As a result, the proper way to invoke this is:
n = ThreadLocalRandom.current().nextInt(1, 7);

// or

n = ThreadLocalRandom.current().nextInt();

// or

n = ThreadLocalRandom.current().nextDouble();
You may wonder why we need so many ways to generate random numbers. Well, methods, implementation, and speed have improved. The standards also have to consider code that is already in use. This means that the old methods need to be used to support older programs, and new methods are presented with different names. As a result, we end up with several versions.
As mentioned, speed improvements have occurred. The program below compares four methods of generating a six-sided die roll.
- The
nextInt()method of theRandomclass. - The
nextDouble()method of theRandomclass (to simulateMath.random()). - The
Math.random()method. - The
ThreadLocalRandom.current().nextInt()with a specified range.
Each highlighted line in Example 2c corresponds to the above list. Each method is used to generate 100 million random numbers. The time required is measured using System.nanoTime() and converted to milliseconds.
import java.util.Random;
import java.util.concurrent.ThreadLocalRandom;

public class StressRandom {

    /**
     * We test a variety of intense random number generations.
     * nanoTime() is used to measure the realtime cost.
     * The actual time for each is pretty revealing.
     */

    public static void main(String[] args) {
        int x, n;
        long startTime, endTime, timeElapsed;
        Random rnd = new Random();

        /*
            Test 100M random ints on the Random() object.
         */
        startTime = System.nanoTime();
        for (x = 1 ; x <= 100000000 ; x++)
            n = rnd.nextInt(6) + 1;
        endTime = System.nanoTime();
        timeElapsed = endTime - startTime;
        System.out.println("Execution time in milliseconds : " +
                timeElapsed / 1000000);

        /*
            Test 100M random doubles on the Random() object.
         */
        startTime = System.nanoTime();
        for (x = 1 ; x <= 100000000 ; x++)
            n = (int)(rnd.nextDouble() * 6 + 1);
        endTime = System.nanoTime();
        timeElapsed = endTime - startTime;
        System.out.println("Execution time in milliseconds : " +
                timeElapsed / 1000000);

        /*
            Test 100M random ints with Math.random().
         */
        startTime = System.nanoTime();
        for (x = 1 ; x <= 100000000 ; x++)
            n = (int)(Math.random() * 6 + 1);
        endTime = System.nanoTime();
        timeElapsed = endTime - startTime;
        System.out.println("Execution time in milliseconds : " +
                timeElapsed / 1000000);

        /*
            Test 100M random ints on ThreadLocalRandom.
         */
        startTime = System.nanoTime();
        for (x = 1 ; x <= 100000000 ; x++)
            n = ThreadLocalRandom.current().nextInt(1, 7);
        endTime = System.nanoTime();
        timeElapsed = endTime - startTime;
        System.out.println("Execution time in milliseconds : " +
                timeElapsed / 1000000);
    }
}
Example 2c: Stressing random number generators.
The typical timing output is shown below.
Execution time in milliseconds : 1221
Execution time in milliseconds : 2469
Execution time in milliseconds : 2547
Execution time in milliseconds : 368
It is essential to remember that none of this discussion touches on equal spread across the range of values. The reader is left to determine the best way to select a random number generator for a given application.
String – Revisited
The String class needs to have some of its more exciting methods discussed. It has already been stated how important the String class is to Java. Consider the next bit of code:
String s;

s = "My string value.";

/* a few statements later */

s = "A new string value.";
This bit of code demonstrates a very important aspect of Java and object management. The reference variable s contains the instance of "My string value." initially. Then, just a few statements later, it possesses the instance of "A new string value."
Let us consider this very carefully. The assignment operator has the power to instantiate a String object and assign the address to s, which means that for each assignment made, a new object was instantiated. The address of the first was assigned to s, then the address of the second was assigned. So when the second address was set, what happened to the memory for the first instance, and what of the knowledge of its whereabouts?
In the C programming language, we would call this a memory leak – losing track of something resulting from carelessness and, once lost, unable to be reclaimed.
Not so with Java! Java keeps track of every instance of every class and a reference count of the number of reference variables that know an object. When the reference count of an instance reaches zero, the instance is destroyed, and the memory is freed up to be used again. This is known as garbage collection. You can force garbage collection at any time during your program by calling the garbage collector with:
System.gc();
Now for more fun with the String class. Table 4 shows some commonly used String methods.
| String Method | Purpose |
|---|---|
char charAt(int index) |
Returns the character at index. |
int indexOf(char ch) |
Returns the index of the first occurrence of ch within the string or -1 if not found. |
String concat(String str) |
Returns the string that is this string concatenated with the string value of str. |
int length() |
Return the length of this string. |
String substring(int start, int end) |
Returns the string that is the substring of this string beginning at start until end-1. |
String substring(int start) |
Returns the string that is the substring of this string beginning at start until the end of the string. |
String toLowerCase() |
Returns the string that is this string with all letters set to lower case. |
String toUpperCase() |
Returns the string that is this string with all letter set to upper case. |
Table 4: Some common String methods.
public class StringEx {

    public static void main(String[] args) {
        // set up some String reference vars.
        String s = "The quick brown fox jumps over the lazy dog.";
        String q, d, j;

        // some typical String operations.
        System.out.println("The length of s is " + s.length());
        System.out.println("s.toUpperCase() is " + s.toUpperCase());
        System.out.println("s.toLowerCase() is " + s.toLowerCase());

        // carving up String objects to form other String objects.
        q = s.substring(4, 9);
        d = s.substring(40, 43);
        j = s.substring(20, 25);

        System.out.println(q + " " + d + " " + j + ".");
    }
}
Example 3: Program to demonstrate some String methods.
The code in Example 3 showcases some of these String methods, and the output of a sample run, with user-provided input in bold, is shown below.
The length of s is 44
s.toUpperCase() is THE QUICK BROWN FOX JUMPS OVER THE LAZY DOG.
s.toLowerCase() is the quick brown fox jumps over the lazy dog.
quick dog jumps.
Knowing details of the String, the substring method is used to pull out the words "quick", "dog" and "jumps"
       0   1   2   3   4   5   6   7   8   9      19  20  21  22  23  24  25      40  41  42  43
     +-------------------------------------------------------------------------------------------+
s -> | T | h | e |   | q | u | i | c | k |   |...|   | j | u | m | p | s |   |...| d | o | g | . |
     +-------------------------------------------------------------------------------------------+
Video showing some basic String operations.
Output with the printf() method
Starting with JDK 5.0, Java offered the printf() method of the standard output object System.out. Those familiar with the printf() function of the C programming language will have no problem adapting to the Java equivalent method. Consider the following example:
final double PI=3.14159;
String s = "My string.";

System.out.printf("Here is the output of our program.%n");
System.out.printf("The value of Pi is %.5f%n", PI);
System.out.printf("The value of s is \"%s\"%n", s);
The printf() method takes as its first argument a string. This string is also known as the format string. Zero or more additional arguments may follow the format string. The format string is essentially a combination of literal text and sequences of placeholders, or format specifiers, that define conversions. The format specifiers are designed to hold a place in the format string, which will be substituted at runtime with a value appropriate to the conversion type.
A format specifier is denoted by the percent (%) sign to indicate that the following sequence of characters describes how the value should be displayed. If a format string contains no format specifiers, then all of the text contained in the format string is processed as if it were a print() method; that is, the cursor remains on the current line and does not move to the beginning of the following line unless an explicit newline (\n or %n) is placed at the end of the format string. A format specifier has the following form:
%[flags][width][.precision]conversion
All of the bracketed values are optional, and their values depend on the conversion selected. Some typical format specifiers are shown in Table 5. One of the nice features of the printf() method is to chop a line into fields of specific sizes to align columnar data. Now, by default, values are right-justified. If the width is wider than the value to be printed, the value will be padded on the left with spaces. If the width is smaller than the value to be displayed, the space will be enlarged to fit the value.
| Format Specifier | Resultant Output |
|---|---|
%-30s |
Left justified, space padded, string data that occupies 30 character columns. |
%c |
Single character data. |
%e |
Precision floating point data in scientific "e" notation. |
%.3f |
Precision floating point data (float or double) as a decimal value printed to 3 decimal places. |
%10d |
Right justified, space padded, decimal integer that occupies 10 character columns. (No precision) |
%03d |
Zero padded, decimal integer that occupies 3 character columns. (No precision) |
%% |
Percent sign. |
%n |
Platform specific newline. |
Table 5: Examples of some simple printf() format specifiers.
public class PrintfEx {

    public static void main(String[] args) {
        String s = "Some string!";
        int x = 32, l;
        double pi = 3.14159;

        // columns from 1 to 30
        System.out.printf("         111111111122222222223%n");
        System.out.printf("123456789012345678901234567890%n");
        System.out.printf("------------------------------%n");

        // decimal integer occupying 10 columns. right then left justified.
        System.out.printf("%10d%n", x);
        System.out.printf("%-10d%n", x);

        // string occupying 30 columns. right then left justified.
        System.out.printf("%30s%n", s);
        System.out.printf("%-30s%n", s);

        // floating point value
        System.out.printf("%f%n", pi);
        // float in 10 columns. 5 for whole number value, one for
        // the decimal point and 4 for the fractional portion.
        System.out.printf("%10.4f%n", pi);
        System.out.printf("%.4f%n", pi);

        l = s.length();
        // strings, ints, and a char.
        System.out.printf("%nThe length of \"%s\" is %d%n", s, l);
        System.out.printf("The last char of \"%s\" is '%c'%n", s, s.charAt(l-1));
    }
}
Example 4: Program demonstrating the use of the printf() method.
The code in Example 4 presents numbered columns. These are used to show where the text is falling about the line. A variety of field widths and left-justify and default justification are demonstrated.
Also shown is a way to use length() to get the last character of the String.
The program in Example 4 produces formatted output shown below.
         111111111122222222223
123456789012345678901234567890
        32
32
                  Some string!
Some string!
3.141590
    3.1416
3.1416

The length of "Some string!" is 12
The last char of "Some string!" is '!'
Wrapper Classes
The wrapper classes are classes that are named similarly to their primitive counterparts. One intent of the wrapper class was to convert from primitives (int, float, char) to objects (Integer, Float, Character) and back again. This can be particularly important in more advanced topics like generics. In Table 6 are listed the Java primitive types and their corresponding wrapper classes.
| Primitive type | Wrapper Class |
|---|---|
int |
Integer |
char |
Character |
short |
Short |
byte |
Byte |
long |
Long |
float |
Float |
double |
Double |
boolean |
Boolean |
Table 6: Primitive type to wrapper class mapping.
It will soon become necessary to convert the string representation of numeric quantities, or numeric strings, into actual integers or doubles. When this happens, you can use the wrapper classes Integer, Float, and Double. These classes contain many static methods, one of which is use for parsing. Parsing is the term for evaluating a sequence of characters and determining if they fit a particular expected pattern. Some examples of wrapper class use are shown in Table 7.
| Wrapper Class Method | Purpose |
|---|---|
Integer.parseInt("12345"); |
Parses the string "12345" and returns an int whose value is 12345. |
Integer.parseInt("10010110", 2); |
Parses the string "10010110" whose radix (base) is 2 and returns an int whose value is 150. |
Integer.parseInt(s); |
Parses the string s and returns the int value represented by s. |
Float.parseFloat("3.14"); |
Parses the string "3.14" and returns the float value 3.14. |
Double.parseDouble("3.1415926"); |
Parses the string "3.1415926" and returns the double value 3.1415926. |
Character.toUpperCase('a'); |
Upcases the character 'a' and returns the converted value as 'A' |
Table 7: Examples using wrapper classes for parsing.
public class StringsAndChars {

    public static void main(String[] args) {
        //          0123456
        String s = "Abc-128";
        String t = "cHARLIE";
        String name;
        int i;
        char c;

        // Test if char is a letter and determine case
        c = s.charAt(1);
        System.out.println("\nFor the character '" + c + "'");
        System.out.println("Letter: " + Character.isLetter(c));
        System.out.println("Upper : " + Character.isUpperCase(c));
        System.out.println("Lower : " + Character.isLowerCase(c));

        // Test if char is a digit
        c = s.charAt(4);
        System.out.println("\nFor the character '" + c + "'");
        System.out.println("Digit : " + Character.isDigit(c));

        // Change the case of the string.
        c = t.charAt(0);
        name = Character.toUpperCase(c) + t.substring(1).toLowerCase();
        System.out.println("\nName  : " + name);

        // Take substring of s ("128") and convert to an int * 2.
        i = Integer.parseInt(s.substring(4)) * 2;
        System.out.println("\ni is  : " + i);
    }
}
Example 5: Combining some String and wrapper class methods.
The output from Example 5 is shown below.
For the character 'b'
Letter: true
Upper : false
Lower : true

For the character '1'
Digit : true

Name  : Charlie

i is  : 256
GUI-based I/O
On to the fun stuff! No programming class is complete without delving into the Graphical User Interface (GUI). This section introduces two methods of the JOptionPane object. The JOptionPane class may be used in your program by importing the javax.swing package.
The first method of the JOptionPane is showInputDialog() and is intended for user input. This method comes in several flavors with several arguments that could be passed to each version. However, for the sake of introduction, we'll stick to the simplest form, which is demonstrated in the following:
The showInputDialog() method
String name;

name = JOptionPane.showInputDialog("Please enter your name.");
This code declares a string called name, which is used to collect the resulting String object returned by the method. The method prompts the user with the String provided as an argument. The resultant dialog box is shown in Illustration 1.
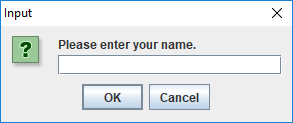
Illustration 1: Result of invoking the showInputDialog() method.
It is important to remember that showInputDialog() returns a String object. This may be obvious since we ask the user for their name, but remember that any use of this method will always return a String object. If you read a numeric quantity from the user, the String object must be converted. This is demonstrated in the next piece of code.
String input;
int age;

input = JOptionPane.showInputDialog("What is your age in years?");
age = Integer.parseInt(input);
The showMessageDialog() method
Output is just as important as reading input from the user when it comes to the GUI. So another method is now introduced called the showMessageDialog() method. This method has several versions, similar to showInputDialog(), and again we will use only one here. The showMessageDialog() method comes in several flavors. The two- and four-argument models are typical, and the general layouts are as follows:
JOptionPane.showMessageDialog(parentComponent, message);
and
JOptionPane.showMessageDialog(parentComponent, message, title, messageType);
The first version does not allow you to provide anything other than a message. You cannot customize the title bar, nor can you choose the type of message graphic.
The parentComponent is an object that represents the parent of the the dialog box. For now, this will be the reserved word, null, indicating that the default component should be used that causes the dialog to appear in the center of the screen.
The message is the body of the dialog and is usually expressed in the form of strings used similar to the println() method.
The title is simply the top line title of the dialog box.
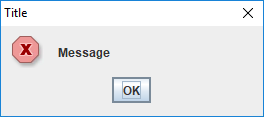
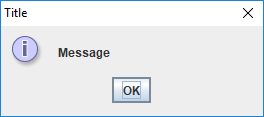
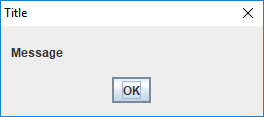
Lastly, the messageType is the category of message being delivered to the user. The options for messageType are shown in Table 5. These values are constants that are defined in the JOptionPane object.
| Value of messageType | Example |
|---|---|
JOptionPane.ERROR_MESSAGE |
 |
JOptionPane.INFORMATION_MESSAGE |
 |
JOptionPane.PLAIN_MESSAGE |
 |
JOptionPane.QUESTION_MESSAGE |
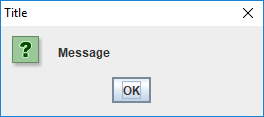 |
JOptionPane.WARNING_MESSAGE |
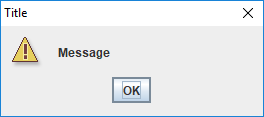 |
Table 5: Example dialogs for the different messageType values.
Each of the dialog box examples in Table 5 were created with the following statement changing only the value of messageType:
JOptionPane.showMessageDialog(null, "Message", "Title", JOptionPane.ERROR_MESSAGE);
When you have the output that needs specific precision in a dialog box, there is no direct way to process this within the showMessageDialog() method. However, there is a way to prepare the formatted output to be part of the message argument of the dialog box.
The format() static method of the String class offers a way to get the precision you need for your output using a format string similar to the printf() method. The program in Example 6 demonstrates the use of showInputDialog(), format() and the showMessageDialog() methods.
import javax.swing.JOptionPane;

public class Perimeter {

    public static void main(String[] args) {
        String input, output;
        double length, width, perimeter;

        // prompt and read length.
        input = JOptionPane.showInputDialog("Length of box:");
        // String needs to be converted to double.
        length = Double.parseDouble(input);

        // repeat for width
        input = JOptionPane.showInputDialog("Width of box");
        width = Double.parseDouble(input);

        // calculation!
        perimeter = 2 * length + 2 * width;

        // build the output as a big String. Note how we cross line
        // boundaries for readability.
        output = String.format("For the box with length %.2f%n", length)
                + String.format("and width %.2f%n", width)
                + String.format("the perimeter is %.2f%n", perimeter);

        // again, crossing line boundaries so we can see each argument passed
        JOptionPane.showMessageDialog(null,
                output,
                "Perimeter of the box.",
                JOptionPane.INFORMATION_MESSAGE);

        System.exit(0);
    }
}
Example 6: Program to demonstrate methods for input, formatting, and output in a GUI.
The dialog boxes produced are as follows. The user entered the values 5 and 12 for length and width, respectively.
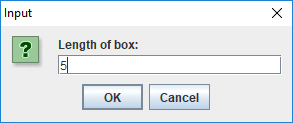
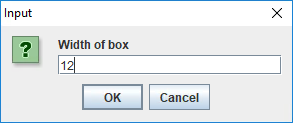
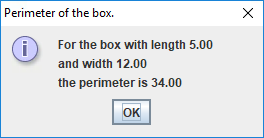
Illustration 2: The three dialog boxes of the Perimeter program.
NOTE: Java programs that use the Swing or other GUI components must use the System.exit() method to assure proper termination. An argument value of zero, as shown in Example 6, indicates successful program termination.
The showConfirmDialog() method
There is another way to get information from the end-user. Specifically, the showConfirmDialog() method can help with YES/NO, YES/NO/CANCEL or OK/CANCEL responses.
int buttonPressed;

buttonPressed = JOptionPane.showConfirmDialog(null, "Shall we continue?");
The above is the simplest example of showConfirmDialog(). This displays a simple set of choices: Yes, No and Cancel.
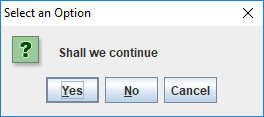
Illustration 3: Dialog box of showConfirmDialog() method.
The possible set of values returned are shown below.
JOptionPane.YES_OPTION

JOptionPane.NO_OPTION

JOptionPane.CANCEL_OPTION

JOptionPane.OK_OPTION

JOptionPane.CLOSED_OPTION
These equate to constant values defined in the javax.swing package. It is recommended that you always use the name shown above to ensure you have consistent behavior between versions of Java.
Of course, you can select the buttons provided to the user. These are defined as additional constants shown below.
JOptionPane.DEFAULT_OPTION

JOptionPane.YES_NO_OPTION

JOptionPane.YES_NO_CANCEL_OPTION

JOptionPane.OK_CANCEL_OPTION
The DEFAULT_OPTION implies that the Look and Feel should not apply any options. This is useful for giving buttons unique names. These options can be used with the overloaded versions of showConfirmDialog(). One of them is shown below:
showConfirmDialog(Component parentComponent, message, title,
                  optionType, messageType)
This is very similar to showMessageDialog(), but we substitute one the constants for optionType.
int buttonPressed;

buttonPressed = JOptionPane.showConfirmDialog(null,
                        "Your requested changes will be applied.",
                        "Confirming modification",
                        JOptionPane.OK_CANCEL_OPTION,
                        JOptionPane.WARNING_MESSAGE);
The dialog box produced is shown below.
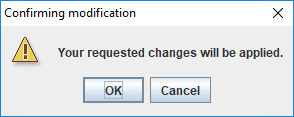
Illustration 4: More specific version of showConfirmDialog().
The showOptionDialog() method
One more method worth mentioning, without getting too far ahead in the Java language constructs, is the showOptionDialog() method.
This can require arrays and some more complex handling of responses. Consider the following method call:
JOptionPane.showOptionDialog(parentComponent, message, title, optionType,
                 messageType, icon, options, initialValue)
Much like the previous output dialogs, the arguments are well-defined. Although an icon can be provided, we will use null just like the parentComponent. Also, we will provide a list of choices for options and select one of the choices as the initialValue.
Consider a non-traditional response.
Object[] options = { "Baguette", "Chips", "Apple" };
int buttonPressed;

buttonPressed = JOptionPane.showOptionDialog(null,
                 "Which do you like more?", "Wondering...",
                 JOptionPane.DEFAULT_OPTION,
                 JOptionPane.QUESTION_MESSAGE,
                 null, options, options[0]);

System.out.println("buttonPressed = " + buttonPressed);
The return value is the index of the option chosen. This would be 0 for Baguette, 1 for Chips, and 2 for Apple. The code snippet produces the following dialog box.
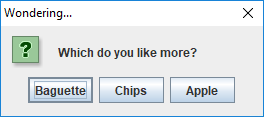
Illustration 5: Using showOptionDialog() for something completely different.
Video demonstrating basic Java GUI with JOptionPane.
Converting println to printf.
This is a brief exercise in translating print() or println() into a printf() method call.
The Premise
Remember that we enjoy a sense of ease of use when writing a println() statement. It is simply, "Print this plus this plus this, then this, and this plus this..."
It's the mental plus that lends itself so easily to writing many println() statements. Effectively, println() has one argument - a big String constructed from all of the parts!
Consider the following taken from various examples:
System.out.println("The value of x raised to the y is " + Math.pow(x,y));
System.out.println("The min value is " + Math.min(x,y));
System.out.println("The max value is " + Math.max(x,y));
System.out.println("You have " + guessLimit + " guesses remaining.");
System.out.println("It's not " + guess +".\n");
System.out.println("\nThe number was " + randomNumber + ".\n");
When converting to printf(), we must remember how this needs to look concerning the argument list. As shown in this link it appears as follows:
public PrintStream format(String format, Object... args)
printf() is a method that takes a format string and zero or more additional Object arguments - separated by commas - to perform the requested output.
Simply stated, printf() wants a format string as the first argument. All subsequent arguments (Object...) are the values to be substituted where the conversions are placed within the format string. This means there are no plus signs mixed in. When you begin the printf() method call, throw plus signs out the window.
The Process
Now, let's get back to the code from above:
System.out.println("The value of x raised to the y is " + Math.pow(x,y));
System.out.println("The min value is " + Math.min(x,y));
System.out.println("The max value is " + Math.max(x,y));
System.out.println("You have " + guessLimit + " guesses remaining.");
System.out.println("It's not " + guess +".\n");
System.out.println("\nThe number was " + randomNumber + ".\n");
First, we determine what the Math methods return, whether it is a double or int.
We need to convert the print() and println() statements to printf(). There is a simple checklist you can follow to convert any println() to printf().
- Change
printlntoprintf. - Take away all embedded values (variable, constants, method calls, etc.) and, maintaining their order, move them to the end separated by commas.
- Substitute conversions (%d, %f, %s, etc) for the values you just removed.
- Remove all the extra quotes (") and pluses (+).
- Change any \n's to %n and add a %n if converting from println().
An Example
Let's try those steps with the following:
System.out.println("You have " + guessLimit + " guesses remaining.");
Step 1: change println to printf
System.out.printf("You have " + guessLimit + " guesses remaining.");
Step 2: Move the embedded values to the end as comma separated values:
System.out.printf("You have " + + " guesses remaining.", guessLimit);
Step 3: Substitute conversions for the removed values
System.out.printf("You have " + %d + " guesses remaining.", guessLimit);
Step 4: Remove the extra quotes and pluses.
System.out.printf("You have %d guesses remaining.", guessLimit);
Step 5: Change \n's to %n and add one more if it is println()
System.out.printf("You have %d guesses remaining.%n", guessLimit);
And we are done!
Here are the converted examples from above:
System.out.printf("The value of x raised to the y is %d%n", Math.pow(x,y));
System.out.printf("The min value is %d%n", Math.min(x,y));
System.out.printf("The max value is %d%n", Math.max(x,y));
System.out.printf("You have %d guesses remaining.%n", guessLimit);
System.out.printf("It's not %d.%n", guess);
System.out.printf("%nThe number was %d.%n%n", ramdonNumber);
Quiz
Exercises
- (Beginner) Which package would you find the following classes:
- Scanner
- FileReader
- String
- PrintWriter
- JOptionPane
- Double
- Math
- Integer
- (Beginner) Which class would you find the following methods:
- pow()
- charAt()
- indexOf()
- nextDouble()
- random()
- showInputDialog()
- length()
- nextLine()
- substring()
- printf()
- println()
- (Intermediate) In your IDE, create some method calls as practice using:
- showInputDialog()
- showMessageDialog()
- showConfirmDialog()
- (Intermediate) Write statements using
Math.random()for the following ranges:- 2 to 6
- 3 to 9
- 30 to 55
- 59 to 65
- (Advanced) Using the
indexOf()String method, write statements to determine the location of the bisecting character in the following strings. Then, usingsubstring(), extract the two pieces into separate strings.- Sally Mathers
- 3d6
- 44*36